< Previous | Contents | Next >
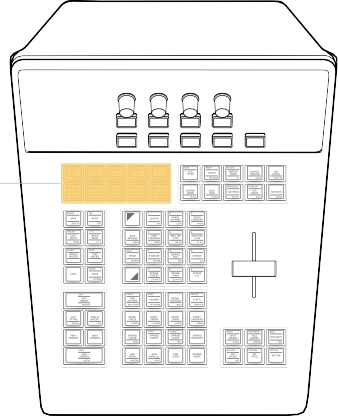
The T-bar panel, typically located on the left for a right-handed colorist, has an LCD display with four variable controls and nine soft keys. The lower section of the panel houses the T-bar control and six groups of hard keys. Each group and their keys are described below.
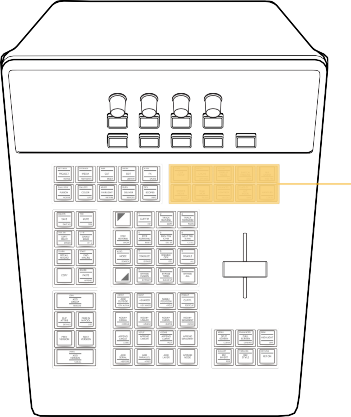
Pages and Layout Group
The Pages and Layout control group at left provides navigation to a number of the GUI pages and a few commonly used methods of opening and closing different panels to customize the Color page UI.
Pages and Layout Keys
![]()
The Pages and Layout keys make it easy to open different pages and panels of the graphical interface.
Key | Shift Up | Primary Function | Shift Down |
SETTINGS/PROJECT/NOTES
| (SETTINGS) Opens and closes the Project Settings | (PROJECT) Opens and closes the Project Manager | (NOTES) Opens and closes the Project Notes window |
STORAGE/MEDIA/METADATA
| (STORAGE) Opens and closes the Disk Storage panel of the Media page | (MEDIA) Opens the Media page | (METADATA) Opens and closes the Metadata Editor on any page it appears |
Key Shift Up Primary Function Shift Down
INSP/CUT/MEDIA (INSP) Opens and closes the Inspector on any page it appears
(CUT) Opens the Cut page
(MEDIA) Opens and closes the Media Pool on any page it appears
INDEX/EDIT/LIBRARY (INDEX) Opens and
closes the Edit Index
(EDIT) Opens the Edit page
(LIBRARY) Opens
and closes the Sound Library on any
page it appears
K/FM/FX/SPLINE (K/FM) Opens and closes the Keyframe Editor on any
page it appears
(FX) Opens and closes the Effects Library.
(SPLINE) Opens and closes the Spline Editor on any page it appears
DUAL VIEW/FUSION/NODES (DUAL VIEW) Toggles
between dual viewers mode and single viewer mode
(FUSION) Opens the Fusion page
(NODES) Opens and closes the Node Editor
GALLERY/COLOR/LUTS (GALLERY) Opens and
closes the Gallery
(COLOR) Opens the Color page
(LUTS) Opens and closes the LUT Browser
MIXER/FAIRLIGHT/METERS (MIXER) Opens and
closes the Mixer panel on any page it appears
(FAIRLIGHT) Opens
the Fairlight page
(METERS) Opens and closes the Audio Meters panel on any page it appears
BURN/DELIVER/REMOTE (BURN) Opens and
closes the floating Data Burn In window
OFX/SCOPES/INFO (OFX) Opens and closes the OFX Library/Settings panel on the Color page; when an effect is applied to the current node, toggles between the Library (list of OFX) and Settings (for the
currently applied OFX)
(DELIVER) Opens
the Deliver page
(SCOPES) Opens and closes the
Video Scopes window
(REMOTE) Turns on Remote Rendering for the current workstation
![]()
(INFO) Opens the Clip Info palette

Layout and Modes Group
The Layout and Modes control group at right provides access to additional ways of customizing the UI and toggling different modes of functionality while you work.
Layout and Modes Keys
![]()
The Layout and Modes keys give quick access to specialized Color page functions.
Key | Shift Up | Primary Function | Shift Down |
CLIPS/CLIP FILTER/–
| (CLIPS) Turns the Thumbnail Timeline on and off in the Color page | (CLIP FILTER) Toggles the Thumbnail Timeline’s clip filtering between All Clips and whichever filter is currently selected; for example, if you choose “Selected Clips,” this toggles between All Clips and Selected Clips | – |
PROXY/CACHE/OPTIMIZE
| (PROXY) Toggles “Use proxy media if available” off and on | (CACHE) Toggles the effects cache among Smart Cache, User Cache, and Off | (OPTIMIZE) Toggles “Use optimized media if available” off and on |
ACTUAL/DISPLAY MODE/FIT
| (ACTUAL) Sets the size of the image in the Viewer to 100% so you can see the actual size of the image | (DISPLAY MODE) Toggle Display Mode switches between hiding and showing the Viewer to make more room for the Color page Node Editor | (FIT) Fits the entire image into the current size of the Viewer, zooming down or up as necessary |
Key | Shift Up | Primary Function | Shift Down |
–/SWITCH TIMELINE/LOCK
| – | (SWITCH TIMELINE) Cycles among all available timelines in the current project | (LOCK) Not yet implemented at the time of this writing |
–/MIX UNMIX/HIDE TRK
| – | (MIX UNMIX) Toggles Unmix on and off; when Unmix is on, each clip in the Color page is shown without transitions or compositing effects, making it easier for you to see your grade in effects heavy programs | (HIDE TRK) Hides all clips on whichever timeline track is currently displayed from the Thumbnail Timeline, so they’re ignored by the playhead, but continue to appear in video out; to show clips on that track again, you must Option-click the number of the track in the Mini Timeline to turn it back on |
–/SCOPES MODE/SCALE
| – | (SCOPES MODE) Cycles among all the available video scopes when the scopes are docked in the palette area | (SCALE) Toggles the video scopes between showing graphs with Video or Data levels |
–/DUAL MON/PICKER
| – | (DUAL MON) Turns the Workspace > Dual Screen option on and off | (PICKER) Toggles the RGB color picker value option between 8- and 10-bit |
ENHANCED/LIGHTBOX/ SDI OUT
| (ENHANCED) Turns on Enhanced Viewer mode in the Color page, with the Viewer shown atop the palette controls | (LIGHTBOX) Toggles the Thumbnail Timeline Lightbox mode on and off | (SDI OUT) Toggles video output of the thumbnail Lightbox on and off |
FLAGS OP/A/C MODE/SAFE
| (FLAGS OP) Toggles the display of clip flags on SDI output | (A/C MODE) Toggles between A-sort and C-sort mode in the Thumbnail Timeline; in C-sort mode, clips are sorted by source timecode so similar clips appear together, in A-sort mode clips are sorted by record timecode so they appear in program order. | (SAFE) Toggles title safe on and off in the Viewer; options for title safe appear in the soft menu of the trackball panel |
![]()
Key | Shift Up | Primary Function | Shift Down |
–/HANDLES/CODEC
| – | (HANDLES) Turns “Show current clip with handles” on and off; this lets you see the currently specified handles for the current clip in the Timeline, so you can track windows and other effects into the handles of media being rendered for round-trip workflows. | (CODEC) Cycles among clips in the Thumbnail Timeline, showing the File Name, the Codec, and the Version number |
Utility Functions Group

This group of keys offers quick access to commonly used commands for saving, 3D functionality, Macros, and copy/paste functions for grading.
![]()
Utility Functions Keys
The Utility Functions keys provide access to a variety of frequently used utilitarian grading, Stereo 3D, and Macro commands.
Key | Shift Up | Primary Function | Shift Down |
ESCAPE/SAVE/SAVE AS
| (ESCAPE) The Escape key on a computer keyboard | (SAVE) Issues the Save command for the current project; this is identical to pressing Command-S | (SAVE AS) Opens the Save Current Project As dialog, so you can save a duplicate of the currently open project; change the name and click Save when you’re done. |
TAB/MUTE/DIM
| (TAB) The Tab key on a computer keyboard | (MUTE) Mutes audio monitoring; often useful when grading terrible programs | (DIM) Toggles between reducing and boosting the volume by 10dB; useful when the client wants to describe their next vacation |
LINK ZM/LEFT/RIGHT/OTHER
| (LINK ZM) For Stereo 3D timeline, toggles Convergence between Linked Zoom and Opposite | (LEFT/RIGHT) For Stereo 3D timelines, toggles between monitoring the Left or Right eye images | (OTHER) For Stereo 3D timeline, to “use the other eye” |
L>R/GANG/SOLO/R>L
| (L>R) For Stereo 3D timelines, copies the left-eye grade to the right eye | (GANG/SOLO) For Stereo 3D timelines, toggles between ganging left- and right-eye grades together so changes to one are made to both, or soloing the left- and right- eye grades to make independent adjustments to each | (R>L) For Stereo 3D timelines, copies the right-eye grade to the left eye |
LEARN/RECALL MACRO/–
| (LEARN) Not yet implemented at the time of this writing | (RECALL MACRO) Not yet implemented at the time of this writing | – |
START/END MACRO/–
| (START) Not yet implemented at the time of this writing | (END MACRO) Not yet implemented at the time of this writing | – |
![]()
Key | Shift Up | Primary Function | Shift Down |
COPY
| – | (COPY) Copies the grade of the current clip in its entirety, including all parts of group grades; you control what part of the copied grade is pasted using different commands. | – |
GRADE/PASTE/APPEND
| (GRADE) Pastes the entire copied grade to overwrite the previous grade; if you copied a group grade, the Pre-Clip, Clip, and Post-Clip grades are all pasted. | (PASTE) Pastes whichever node was the current node when the grade was copied to overwrite the current node’s settings; the current node is outlined orange. | (APPEND) Appends every node of the entire copied grade after the last node of the current grade; if you copied a group grade, the Pre-Clip, Clip, and Post-Clip grades are all appended as a flattened collection of nodes. |
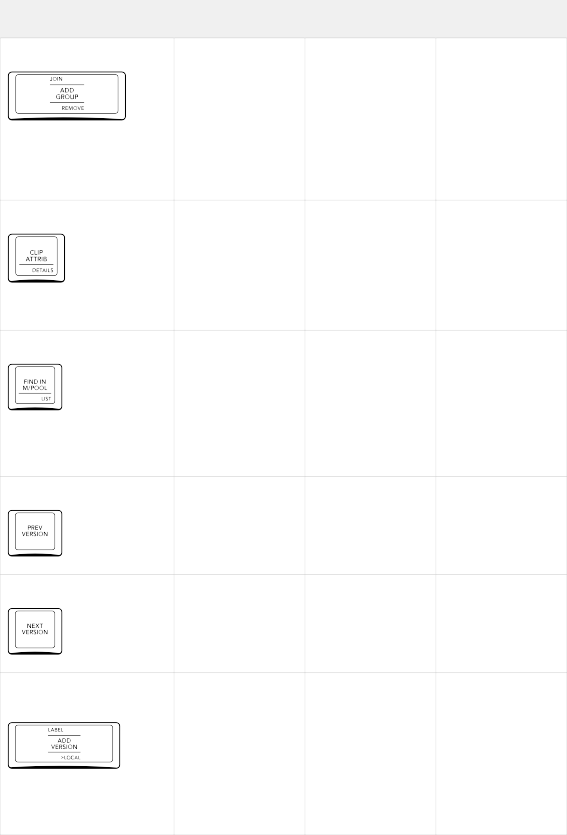
Clip and Version Group
These keys, at the bottom left of the T-bar panel, are used to manage clips and their grades in different ways, by creating and managing group assignments, clip attributes, and grade versions.
![]()
Clip and Version Keys
The Clip and Version keys let you manage groups and grade versions with ease.
Key Shift Up Primary Function Shift Down
JOIN/ADD GROUP/REMOVE ( JOIN) Adds the
current clip (or currently selected clips) to the current group (which is based on whichever group the last “grouped clip” you selected belonged to)
(ADD GROUP) Creates a brand new group and opens the Group Name dialog for you to type into (click
OK to save the new group)
(REMOVE) Removes the current clip (or currently selected clips) from whichever group it belongs to
–/CLIP ATTRIB/DETAILS – (CLIP ATTRIB) Opens
the Clip Attributes window for the currently selected clip
(DETAILS) Toggles the floating Clip Details window open and closed, with which you can see various clip and grade properties for reference
–/FIND IN M/POOL/LIST – (FIND IN M/POOL)
Selects the source clip in the Media Pool that corresponds to the current clip in the Timeline; opens the Media Pool to show the clip
(LIST) Switches the Media Pool to List view; the Media Pool does not
automatically open if closed.
PREV VERSION – (PREV VERSION) –
Cycles the grade of the current clip to the previously numbered version
NEXT VERSION – (NEXT VERSION) –
![]()
Cycles the grade of the current clip to the next numbered version
LABEL/ADD VERSION/LOCAL
(LABEL) Opens the Version Name dialog, so you can rename the current version of the current clip; click OK when you’re done.
(ADD VERSION) Adds
an additional version of the grade for the current clip; you
can create multiple versions of a grade to save variations for future recall.
(>LOCAL) Toggles between Use Local Grades and Use Remote Grades; switching between Local and Remote grades doesn’t change or copy either set of grades.
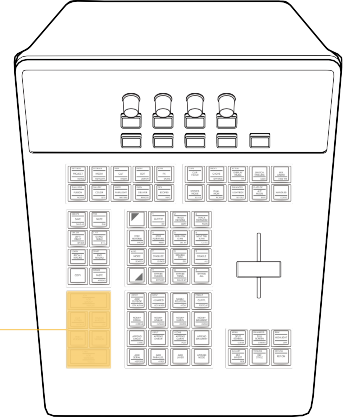
Utility Group
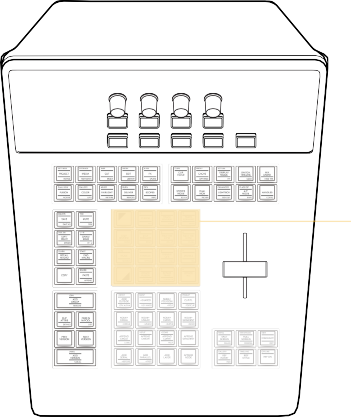
This group of keys, in the center of the T-bar panel, includes commands for tracking and stabilization, enabling/disabling grades and nodes and OFX, and bypassing Fusion effects and Grades. These keys can also function as a numeric keypad for future features.
Utility Keys
![]()
The Utility keys provide controls for tracking and stabilization, as well as disabling and bypassing various grading controls.
Key | Shift Up | Primary Function | Shift Down |
SHIFT UP
| – | (SHIFT UP) Enables use of any of the SHIFT UP key functions at the top of various keys | – |
1/CLIP/FM/+KF
| (1) The one key; can be used in conjunction with SELECT NODE to jump to a particular node | (CLIP/FM) Switches the mode of motion tracking or keyframing of window shape and position in the tracking graph between Clip mode (where adjustments are made globally to the entire duration of a window) and Frame mode (where adjustments are made at specific frames, adding keyframes to the Tracker graph to animate a window) | (+KF) Adds a keyframe to the tracking graph, typically used while in Frame mode where keyframes are added while rotoscoping image movement with a window |
Key | Shift Up | Primary Function | Shift Down |
2/TRACK REVERSE/COPY
| (2) The two key; can be used in conjunction with SELECT NODE to jump to a particular node | (TRACK REVERSE) Initiates motion tracking in reverse for the currently selected window | (COPY) Copies track data from the currently selected window |
3/TRACK FORWARD/PASTE
| (3) The three key; can be used in conjunction with SELECT NODE to jump to a particular node | (TRACK FORWARD) Initiates motion tracking forward for the currently selected window | (PASTE) Copies track data to the currently selected window |
–/STEP REVERSE/SHOW
| – | (STEP REVERSE) Initiates window tracking in reverse by one frame and then stops, giving you time to evaluate the result | (SHOW) Toggles Show Track on and off; shows the motion path of the currently selected motion tracking data in the Viewer |
4/STEP FORWARD/RESET
| (4) The four key; can be used in conjunction with SELECT NODE to jump to a particular node | (STEP FORWARD) Initiates window tracking forward by one frame and then stops, giving you time to evaluate the result | (RESET) Resets all motion tracking in the Tracking graph |
5/PREV TRK K/FM/DEL KF
| (5) The five key; can be used in conjunction with SELECT NODE to jump to a particular node | (PREV TRK K/FM) Moves the playhead to the previous keyframe in the Tracker graph | (DEL KF) Deletes the keyframe at the position of the playhead in the Tracker graph |
6/NEXT TRK K/FM/CL ALL
| (6) The six key; can be used in conjunction with SELECT NODE to jump to a particular node | (NEXT TRK K/FM) Moves the playhead to the next keyframe in the Tracker graph | (CL ALL) Deletes all keyframes in the Tracker palette |
AUTO/MODE/SEARCH
| (AUTO) Performs an Auto Balance function in the Primaries palette | (MODE) Turns on the Modes soft menu on the Trackball panel, so you can choose different functions including OBJECT TRACKING, PROXY ON/OFF, POTS, RIPPLE mode, WIPE mode, SWITCH SESSION, SAFE AREA, CACHE mode, CUE mode, SCROLL mode, and 3D | (SEARCH) Not yet implemented at the time of this writing |
![]()
Key | Shift Up | Primary Function | Shift Down |
7/STABILIZE/BYPASS
| (7) The seven key; can be used in conjunction with SELECT NODE to jump to a particular node | (STABILIZE) Initiates image stabilization for the current clip, using the current settings in the Tracking palette’s Stabilizer mode | (BYPASS) Toggles image stabilization off and then on again, so you can compare the stabilized image to the original |
8/DISABLE OFX/DEL
| (8) The eight key; can be used in conjunction with SELECT NODE to jump to a particular node | (DISABLE OFX) Toggles OFX on and off if one has been applied to the current node | (DEL) Removes an OFX effect that’s been added to a node |
9/DISABLE ALL/–
| (9) The nine key; can be used in conjunction with SELECT NODE to jump to a particular node | (DISABLE ALL) Toggles all nodes for the current clip off and then on | – |
SHIFT DOWN
| – | (SHIFT DOWN) Enables use of any of the SHIFT DOWN key functions at the bottom of various keys | – |
*/BYPASS FUSION/EXTRACT
| (*) The Asterisk key | (BYPASS FUSION) Toggles all Fusion page effects off and then on for the current clip | (EXTRACT) Disconnects the selected node from the node graph, but leaves it in the Node Editor, ready to be reconnected somewhere else |
0/BYPASS TRIMS/CLEAN UP
| (0) The zero key; can be used in conjunction with SELECT NODE to jump to a particular node | (BYPASS TRIMS) Toggles all Color page effects off and then on for the current clip | (CLEAN UP) Cleans up unruly node graphs to be more ruly |
#/BYPASS ALL/–
| (#) The Hash key (or Pound sign) | (BYPASS ALL) Toggles both Color and Fusion page effects off and then on for the current clip | – |
![]()
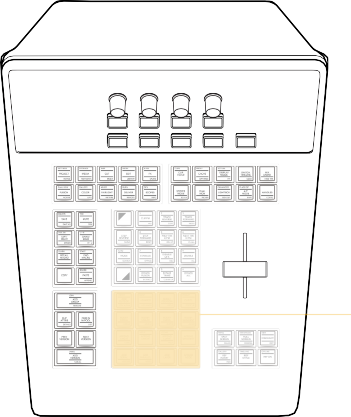
Node Control Group
This group of keys, at the bottom center of the T-bar panel, lets you quickly create the many different kinds of nodes that are available with which to organize your grades in the Node Editor of the
Color page.
The DaVinci Resolve Color page is a node-based grading system, where the adjustments you make appear as nodes in the Node Editor. Each node contains one or more adjustments that work together.
This is similar to the layers that appear in other applications, however nodes provide the flexibility to route image data nonlinearly within a grade, connecting the output of one node to the input of any other node farther down the tree of nodes, branching image processing operations or recombining them via parallel or serial layer nodes to combine Color page functions in creative ways to create sophisticated operations.
Node Control Keys
![]()
The Node Control keys let you create a wide variety of nodes for grading.
Key | Shift Up | Primary Function | Shift Down |
+INPUT/ADD OUTSIDE/ OFX ALPHA
| (+INPUT) Lets you add inputs to any mixer node, including the Parallel Mixer, the Layer Mixer, and the Key Mixer | (ADD OUTSIDE) Adds a Corrector node in serial that connects both its RGB and KEY inputs to the outputs of the node before it, with the KEY input inverted, so you can make adjustments to parts of an image that are outside the preceding node’s qualified or windowed area. | (OFX ALPHA) Turns on “Use OFX Alpha” to enable the selected node to output whatever |
SWAP/>SHARED/ KEY MIXER
| (SWAP) Does “Morph into Layer Mixer Node” or “Morph into Parallel Mixer Node” if a relevant Mixer node is selected; Changes a Parallel Mixer into a Layer Mixer and vice versa | (>SHARED) Turns the currently selected node into a Shared node; Shared nodes automatically ripple adjustments other grades that use the same Shared node. | (KEY MIXER) Adds a Key Mixer node with its first KEY input attached to the currently selected node’s KEY output; Key Mixer nodes let you combine multiple keys. |
Key Shift Up Primary Function Shift Down
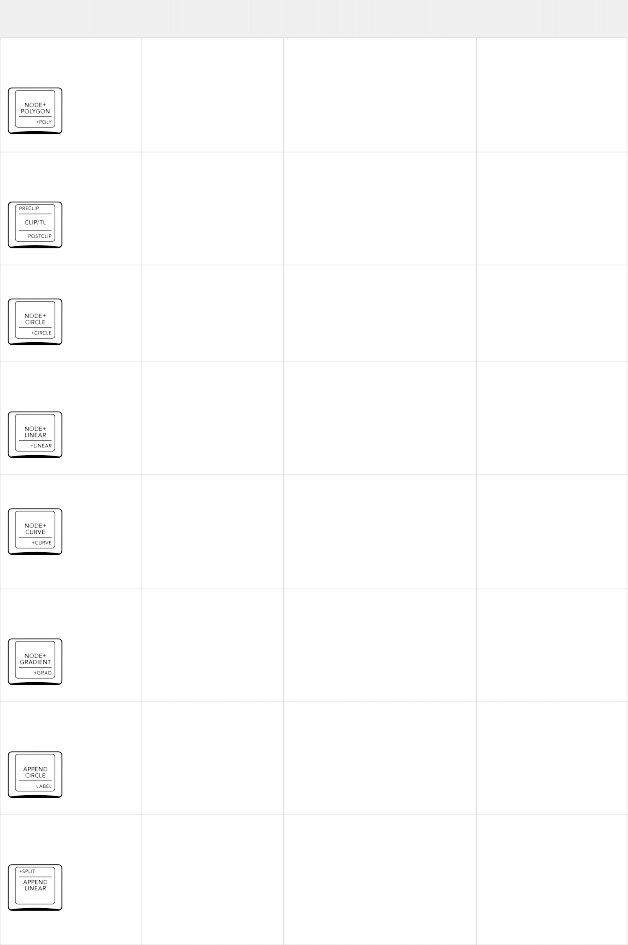
–/NODE+POLYGON/
+POLY
– (NODE+POLYGON) Adds a
Corrector node in serial with a polygon window automatically enabled for fast isolation; you can begin drawing a polygon immediately in the Viewer.
(+POLY) Turns on the polygon window for the currently selected node.
PRECLIP/CLIP/TL/ POSTCLIP
(PRECLIP) Opens the Pre-Clip group grade mode of the Node Editor; only works when a clip is part of a group
(CLIP/TL) Toggles between the Clip and Timeline grade modes of the Node Editor
(POSTCLIP) Opens the Post-Clip group grade mode of the Node Editor; only works when a clip is part of a group
NODE+CIRCLE/+CIRCLE – (NODE+CIRCLE) Adds a Corrector
node in serial with a circular window automatically enabled for fast isolation
(+CIRCLE) Turns on the circular window for the currently selected node
NODE+LINEAR/
+LINEAR
– (NODE+LINEAR) Adds a Corrector node in serial with a linear window automatically enabled for fast isolation
(+LINEAR) Turns on the linear window for the currently selected node
NODE+CURVE/+CURVE – (NODE+CURVE) Adds a Corrector
node in serial with a circular window automatically enabled for fast isolation. You can begin drawing a custom curve shape immediately in the Viewer.
(+CURVE) Turns on the curve window for the currently selected node
NODE+GRADIENT/
+GRAD
–/APPEND CIRCLE/ LABEL
– (NODE+GRADIENT) Adds a
Corrector node in serial with a gradient window automatically enabled for fast isolation
– (APPEND CIRCLE) Appends a Corrector node in serial with a circular window enabled at the end of your node tree
(+GRAD) Turns on the gradient window for the currently selected node
![]()
(LABEL) Lets you type a label above the selected node to identify what it does
+SPLIT/APPEND LINEAR/–
(+SPLIT) Adds a Splitter node to your node tree, which splits the red, green, and blue image channels into separate outputs for separate processing
(APPEND LINEAR) Appends a –
Corrector node in serial with a linear window enabled at the end of your node tree
Key | Shift Up | Primary Function | Shift Down |
+COMB/APPEND CURVE/POLY
| (+COMB) Adds a Combiner node to your node tree, which combines red, green, and blue image channels that have been split back into a single image | (APPEND CURVE) Appends a Corrector node in serial with a Custom Curve window enabled at the end of your node tree. You can begin drawing a custom curve shape immediately in the Viewer. | (POLY) Appends a Corrector node in serial with a custom curve window enabled at the end of your node tree. You can begin drawing a polygon shape immediately in the Viewer. |
APPEND GRADIENT
| – | (APPEND GRADIENT) Appends a Corrector node in serial with a gradient window enabled at the end of your node tree | – |
ADD SERIAL/+BEFORE
| – | (ADD SERIAL) The most common way of adding Corrector nodes is in serial, where each new node’s input is connected to the previous node’s output, one after another. Adjustments in preceding nodes will be the starting point for subsequent nodes, so they all work together to combine different sets of adjustments in serial order, similar to layers in a layer-oriented system. | (+BEFORE) Adds a corrector node in serial prior to (before) the currently selected node |
ADD PARALLEL/+FIRST
| – | (ADD PARALLEL) Adds a Corrector node in parallel underneath the currently selected node, with both connected to a multi-input Parallel Mixer node (creating one if necessary) so that all input images are mixed together. Each node in parallel shares the same input image, so you can perform multiple operations to the same image and combine them back together. | (+FIRST) Adds a Corrector node before the currently selected parallel node, so that both nodes sit within the same parallel branch of the node tree, with the new node preceding the original one. |
ADD LAYER
| – | (ADD LAYER) Adds a Corrector node as a layer underneath the currently selected node, connected to a multi-input Layer Mixer node (creating one if necessary) so that its output has higher mix priority than any other nodes previously connected to the same Layer Mixer. The Layer Mixer node combines the outputs of multiple nodes such that the image output by lower nodes takes priority over images output by higher nodes. Layer Mixer nodes can also be set to use different composite modes to combine images together in different ways. | – |
![]()
Key | Shift Up | Primary Function | Shift Down |
APPEND NODE
| – | (APPEND NODE) Adds a corrector node serially to the very end of the node graph. | – |
The T-Bar Control
The T-bar control is a vertical lever that you can push and pull up and down. Functioning as a fader, it’s mainly used to control the mix or wipe of a reference image against the current clip being evaluated.
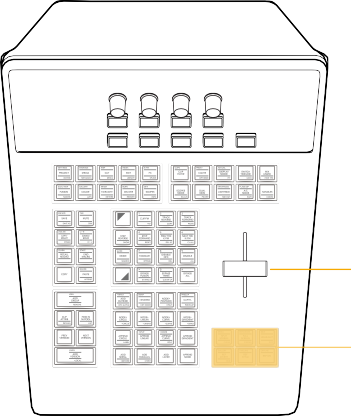
Which reference is being compared, and the method of comparison, is controlled by the Viewer and Reference Group of fixed keys immediately below it.
The T-Bar Control
Viewer and Reference Keys
![]()
The T-bar control is a vertical lever that controls Reference Wipes or Split Screen comparisons. The Viewer and Reference keys let you choose how to set up comparison wipes and split-screen effects to help you grade.
Viewer and Reference Group
This area below the T-bar includes six keys that let you choose among different reference modes for the Viewer, different Viewer modes, and the Highlight mode. When an appropriate mode is active, the fader bar controls the mix or wipe position for that mode.
Key | Shift Up | Primary Function | Shift Down |
MENU/SPLIT SCREEN/CLEAN
| (MENU) Press to show a row of Split Screen view options in the Trackball panel soft buttons, with which to compare multiple clips | (SPLIT SCREEN) Toggles a split screen comparison on and off, with which to compare multiple clips in different ways | (CLEAN) Toggles Video Clean Feed on and off (Workspace > Video Clean Feed) |
ENHANCED/FULL SCREEN/ CINEMA
| (ENHANCED) Sets the Viewer to Enhanced mode | (FULL SCREEN) Sets the Viewer to Full Screen mode | (CINEMA) Sets the Viewer to Cinema mode |
B&W/HIGHLIGHT/DIFF
| (B&W) Toggles the Highlight between high-contrast Black and White mode and the regular gray modes | (HIGHLIGHT) Toggles the Highlight on and off; used to see the resulting matte when adjusting a Qualifier or Window isolation | (DIFF) Toggles the Highlight between Difference and the regular gray modes |
GALLERY/REF INVERT/RGB
| (GALLERY) Sets the currently selected clip in the gallery as the reference image | (REF INVERT) Inverts the left and right halves of the images being compared | (RGB) Shows an individual red, green, or blue channel in the Viewer; press SHIFT DOWN, then REF INVERT, then the 1 (labeled Green), 3 (labeled Blue), or 5 (labeled Red) buttons on the Search Dial panel. Press REF INVERT to go back to viewing RGB. |
TIMELINE/REF STYLE/–
| (TIMELINE) Lets you compare the current still in the Gallery to the Timeline image | (REF STYLE) Cycles among all the different split-screen wipe styles, so you can choose how to compare the current and reference images | – |
OFFLINE/REF ON
| (OFFLINE) Compares the current frame at the playhead to the currently assigned Offline Reference Movie frame at the same timecode | (REF ON) Toggles a Gallery wipe on and off, with which to compare a saved still to the current clip | – |
![]()