< Previous | Contents | Next >
Resizing an individual audio timeline track using contextual menu options
Zooming Audio Waveform Height
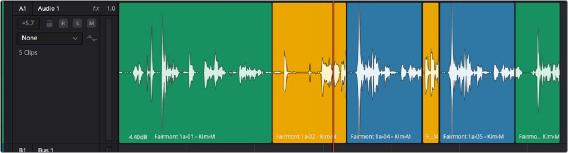
You can zoom into or out of the audio waveforms shown in each clip of one or more tracks, to make them taller or shorter, or you can reset them to their default sizes. This doesn’t change the audio levels of clips in affected tracks, it just lets you make the audio waveforms easier to see.
Hold down Command-Option, and roll the scroll wheel or control up or down to resize all waveforms in all tracks.
You can also use commands that are accessed in the top menu View > Zoom Audio Waveform for any track on the Timeline. You can select one or multiple tracks to resize their waveforms all at once. There are three sets of commands in the menu:
— Reset
— Zoom Increase Height
— Zoom Decrease Height
Right-clicking any clip in the Timeline allows you to access the Track Waveform Zoom submenu with even more zoom options.
Audio Editing Modes
The Fairlight page has two audio editing modes: Overwrite Mode and Layered Audio Editing Mode.
![]()
Overwrite Mode
As the name suggests, if one a portion of a clip overlaps another clip during an edit, the area that is affected on the underlying clip is non-destructively deleted to accommodate the incoming clip. If the overlapping clip is moved or deleted, the underlying clip remains truncated.

Overwrite is the default mode and is best for most generalized editing.
Overwrite is the default mode and is best for most generalized editing.
Overwrite is the default mode and is best for most generalized editing.
Any area that is removed by this process is still present in the original clip and can be exposed by trimming the start or end (depending on what you’ve affected).
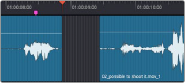
Overwrite edit showing original clips (left), right hand clip dragged left (middle) and resulting overlap (right)
Layered Audio Editing
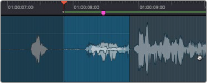
Layered Audio Editing is a special audio editing mode that lets you superimpose multiple audio clips in the same track, with audio clips edited into the top layers muting overlapping sections of audio clips appearing on lower layers. With layered audio editing enabled (Timeline > Layered Audio Editing), superimposed audio clips are treated similarly to superimposed video clips that have opacity set to 100%, with clips on top obscuring (or muting) clips underneath. You can separately toggle this on and off in the View menu > Show Audio Track Layers.
This mode is very useful for any situation where you’re combining segments of multiple takes together (“comping”) to create a single voiceover, audio vocal track, ADR, or dramatic performance, as you can choose which segments to use via their superimposed position in the stack of clips appearing in that track, while preserving the other takes underneath in case you might want them later.

TIP: Layered Audio Editing mode can be used on audio tracks on the Edit page as well.
TIP: Layered Audio Editing mode can be used on audio tracks on the Edit page as well.
TIP: Layered Audio Editing mode can be used on audio tracks on the Edit page as well.
However, it’s important to understand that if delete any clip on a layer that is “above” another, the lower layer will then “poke through.” This can involve extra housekeeping when editing, and is one of the reasons that Overwrite Editing mode is the default mode.
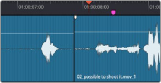
Layered Audio Editing and Show Audio Track Layers enabled
![]()
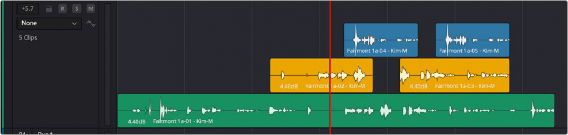
Layered Audio Editing with Show Audio Track Layers disabled. All layers are folded into a single view.