< Previous | Contents | Next >
After working with Layered Audio Editing, it can be useful to create a “comp” (composite) of a performance in order to have a single element that reflects the final desired result. Timeline > Flatten Audio Layers allows you to create a single edit without layers where the clip boundaries are preserved. Choosing this command will cut across each layered clip at the in/out points and flatten them into a single layer.
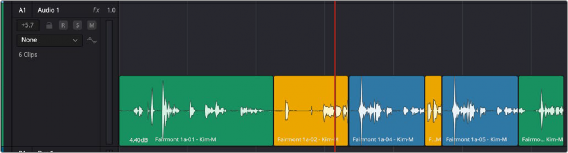
After choosing Flatten Audio Layers, audio layers showing (so blank space above).

NOTE: If you are exporting to an AAF, you’ll want to turn off layered audio editing, as only the first, lowest layer is exported. If you had already been using layered audio editing, you can first use Flatten Audio Layers, then perform your AAF export. Keep in mind that if you have created any layered crossfades, only fades on the incoming clip are retained.
NOTE: If you are exporting to an AAF, you’ll want to turn off layered audio editing, as only the first, lowest layer is exported. If you had already been using layered audio editing, you can first use Flatten Audio Layers, then perform your AAF export. Keep in mind that if you have created any layered crossfades, only fades on the incoming clip are retained.
NOTE: If you are exporting to an AAF, you’ll want to turn off layered audio editing, as only the first, lowest layer is exported. If you had already been using layered audio editing, you can first use Flatten Audio Layers, then perform your AAF export. Keep in mind that if you have created any layered crossfades, only fades on the incoming clip are retained.
Switching Among Multiple Timelines
Timelines can be organized like any other clip in the Media Pool. To open or switch among timelines, use the following procedures. Each Timeline retains the view settings last made within it, including track heights, zoom settings, etc.
— In the Edit, Cut, or Fairlight page Media Pool, double-click a timeline.
— In the Edit page Timeline Viewer, choose a timeline from the Timelines drop-down menu at the top of the viewer.
— In the Color page, choose a timeline from the Timelines drop-down menu at the top of the viewer.
— In the Fairlight page, choose a timeline from the Timelines drop-down menu to the left of the transport controls.
![]()
Toolbar
The Toolbar has buttons that let you choose modes of functionality and other buttons that let you execute commands such as placing markers and flags.
![]()
Icons in the Fairlight Page toolbar when the Automation button is highlighted in the transport bar
![]()
![]()
![]()
![]()
![]()
— The Selection tool (I-beam) appears when you move the cursor over the upper area of the waveform track “lane,” and lets you make time range selections of clips or automation keyframe data (depending on the track view).
— The Hand tool appears when you move the cursor over the lower area of the waveform lane, and lets you select a clip or clips by clicking, move them by dragging, or apply Cut, Copy, and Paste operations. This tool is available in the other modes as well.
— The Trim tool (Up/Down arrows) appears when you move the cursor close to the clip gain line, and lets you trim the automaton curve for clip gain or keyframe levels. When trimming an automation parameter, a tooltip shows the level along with the delta to the original value. Trim tool cursors for trimming clip boundaries to trim clip start or end, or perform rolling trims are also available. This tool is available in the other modes as well.
![]()
![]()
![]()
![]()
![]()
![]()
![]()