
< Previous | Contents | Next >
Dragging Audio Clips Into the Timeline
TIP: Dragging one or more clips to the empty area underneath the existing audio tracks of the Timeline results in the creation of new tracks, each of which is automatically mapped to however many channels are required by each audio clip being edited.
TIP: Dragging one or more clips to the empty area underneath the existing audio tracks of the Timeline results in the creation of new tracks, each of which is automatically mapped to however many channels are required by each audio clip being edited.
TIP: Dragging one or more clips to the empty area underneath the existing audio tracks of the Timeline results in the creation of new tracks, each of which is automatically mapped to however many channels are required by each audio clip being edited.
You can show the Media Pool in the Fairlight page, and edit audio clips into the Timeline in their entirety by dragging and dropping individual clips onto whichever audio track you want them to appear. You can drag any clip onto any track, regardless of whether or not the channels of the clip match the channel mapping of the track. However, if you edit a clip with more channels than a track has (for example, editing a stereo clip onto a mono track), only the channels supported by that track will be output, with all other channels in that clip being muted. If this happens, you can always remap the audio track by right-clicking the track header and choosing a new mapping from the Change Track Type To submenu.
If you want to edit several clips into the Timeline at once by dragging them from the Media Pool, you’ll probably want to do a bit of preparation to make sure they’re edited in the right order.
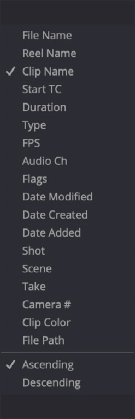
1 Change the sort order of the Media Pool’s browser area to put the clips into the order in which you want them to appear. In Thumbnail view you can use the Sort Order menu, but in List view you can click the header of any metadata column to sort by that column’s data.
2 Use the Media Pool thumbnails, the Media Pool List view Filmstrip, or the Source Viewer to set In and Out points to define the part of each clip that you want to edit into the Timeline.
3 Select the Media Pool clips you want to edit into the Timeline by dragging a bounding box, Command- dragging multiple bounding boxes over different sets of clips, by Shift-clicking a range of clips, or by Command-clicking individual non-contiguous clips.
4 Drag any of the selected clips to the desired position in the Timeline to perform an overwrite edit.

It’s possible to edit audio clips into the Timeline so that each clip’s timecode lines up with the Timeline Ruler. This can be useful if you’re organizing multiple source audio recordings that you want to synchronize together on multiple tracks.
It’s possible to edit audio clips into the Timeline so that each clip’s timecode lines up with the Timeline Ruler. This can be useful if you’re organizing multiple source audio recordings that you want to synchronize together on multiple tracks.
It’s possible to edit audio clips into the Timeline so that each clip’s timecode lines up with the Timeline Ruler. This can be useful if you’re organizing multiple source audio recordings that you want to synchronize together on multiple tracks.
![]()
The clip(s) you drag overwrite whatever other clips they overlap in the Timeline. Multiple clips dragged from the Media Pool will be edited in the order in which they’re sorted in the Media Pool, using each clip’s In and Out points.
Using the Sort Order menu to change the sort order of clips in the Media Pool