< Previous | Contents | Next >
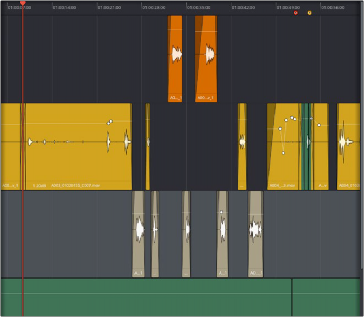
The graphic below shows how the Batch Fades are applied. Clips that are not connected have Fade In and Fade Out applied. Clips that are connected have Crossfades applied. The Batch Fades window determines each of the Fade parameters and then applies them to all of the selected clips. In this example, the Overwrite box was unchecked. Compare the fades that were already there and see that they retain their original Fade length and shape.
All of the highlighted clips have been faded according to the Batch Fades window.

NOTE: If the media is too short, a dialog box will alert you that there are insufficient handles and that the fade could not be created. You can then choose to trim clips, skip clips, or cancel the Batch Fade. If you cancel, you can then alter the settings to better suit the media.
NOTE: If the media is too short, a dialog box will alert you that there are insufficient handles and that the fade could not be created. You can then choose to trim clips, skip clips, or cancel the Batch Fade. If you cancel, you can then alter the settings to better suit the media.
NOTE: If the media is too short, a dialog box will alert you that there are insufficient handles and that the fade could not be created. You can then choose to trim clips, skip clips, or cancel the Batch Fade. If you cancel, you can then alter the settings to better suit the media.
Fade In and Out to Playhead
![]()
A pair of commands in the Trim menu let you move the playhead over a clip, and use the playhead position to “Fade In to Playhead” or “Fade Out to Playhead.” These commands work in both the Edit and Fairlight pages.
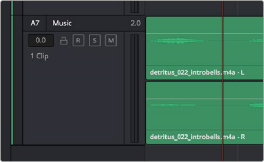
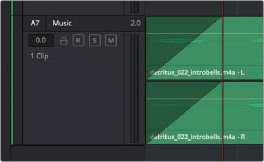
(Left) Placing the playhead where you want a fade in to end, (Right) Using Fade In to Playhead