< Previous | Contents | Next >
DaVinci Resolve has a dedicated mechanism for automatically managing the size of clips with resolutions that don’t match the timeline resolution, and it’s separate from the Zoom transform controls that are available for making creative adjustments to clips. This is called Image Scaling, and it’s customizable in a few different areas.
Resize Filter Project Setting
![]()
The Resize Filter setting lets you choose the filter method that’s used to interpolate image pixels when resizing clips:
— Smoother: May provide a more pleasing result for projects using clips that must be scaled down to standard definition as this filter exhibits fewer sharp edges at SD resolutions.
— Bicubic: While the sharper and smoother options are slightly higher quality, bicubic is still an exceptionally good resizing filter and is less processor-intensive than either of those options.
— Blinear: A lower quality setting that is less processor-intensive. Useful for previewing your work on a low-performance computer before rendering when you can switch to one of the higher quality options.
— Sharper: Usually provides the best quality for most projects, using an optical quality processing technique that’s unique to DaVinci Resolve.
— Custom: This setting lets you take control of the exact algorithm used in all resizing operations. The custom Resize Filter options available are: Bessel, Box, Catmul-Rom, Cubic, Gaussian, Lanczos, Mitchell, Nearest Neighbor, Quadratic, and Sinc. In practice, the difference between these methods can be quite subjective. However, if you need to match a specific resizing method used from another application, you can do it here. For everyday use, the normal resizing filters in DaVinci Resolve should be sufficient.
— Override Input scaling: Checking this box lets you choose an Input Sizing preset to apply to the project.
— Override Output scaling: Checking this box lets you choose an Output Sizing preset to apply to the project.
— Anti-alias edges: A second group of settings lets you choose how to handle edge anti-aliasing for source blanking.
— Auto: Adds anti-aliasing when any of the Sizing controls are used to transform the image. Otherwise, anti-aliasing is disabled.
— On: Forces anti-aliasing on at all times.
— Off: Disables anti-aliasing. It might be necessary to turn anti-aliasing off if you notice black blurring at the edges of blanking being applied to an image.
— Deinterlace quality: (only available in Studio version) A fourth group of settings lets you choose the quality/processing time tradeoff when deinterlacing Media Pool clips using the Enable Deinterlacing checkbox in the Clip Attributes window. There are two settings:
— Normal: A high-quality deinterlacing method that is suitable for most clips. For many clips, Normal is indistinguishable from High. Normal is always used automatically during playback in DaVinci Resolve.
— High: A more processor-intensive method that can sometimes yield better results, depending on the footage, at the expense of slower rendering times.
— DaVinci Neural Engine: This option uses the advanced machine learning algorithms of the DaVinci Neural Engine to analyze motion between the fields of interlaced material and reconstructs them into a single frame. This option is very computationally intensive, but ideally will deliver an even more aesthetically pleasing result than the “high” setting.
Input Scaling Project Setting
![]()
If the native resolution of an imported clip doesn’t match the timeline resolution, then the currently selected Input Scaling Preset in the Image Scaling panel of the Project Settings dictates how mismatched clips will be handled project-wide. The default setting is “Scale entire image to fit,” which shrinks or enlarges the image to fit the current dimensions of the frame without cropping any part of the image, adding letterboxing or pillarboxing as necessary to fill the unused portion of the frame depending on whether the horizontal or vertical dimension of the image hits the edge of the frame first.
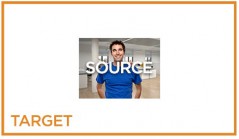
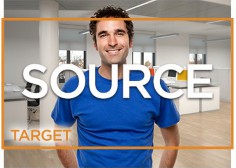
The Mismatched resolution files option let you choose how clips that don’t match the current project resolution are handled. The illustrated examples below show an SD clip being fit into an HD project using each of the different options.
— Center crop with no resizing: Clips of differing resolution are not scaled at all. Clips that are smaller than the current frame size are surrounded by blanking, and clips that are larger than the current frame size are cropped. Keep in mind that this is a good setting to use if you’re importing a timeline from another NLE in which clip resolution adjustments are imported as scaling adjustments. Choosing “Center Crop with no resizing” prevents DaVinci Resolve from “double scaling” clips in imported timelines.
— Scale full frame with crop: Clips of differing resolution are scaled so that the clip fills the frame with no blanking. Excess pixels are cropped. This is a good setting when you want clips that don’t match the project resolution to automatically fill the frame, with no letterboxing or pillarboxing.
— Scale entire image to fit: The default setting. Clips of differing resolution are scaled so that each clip fills the frame without cropping. The dimension that falls short has blanking inserted (letterboxing or pillarboxing). This is a good setting when you want clips that don’t match the project resolution to automatically fit into the frame without being cropped in any way, and you’re fine with letterboxing or pillarboxing as a result. However, if you’ve imported a timeline from another NLE and there are clips that are twice as big as they should be, it’s because this setting
![]()
is on by default, and your imported timeline has imported scaling settings used to resize clips that didn’t match the timeline resolution. If this happens, switch to “Center crop with no resizing” instead, and that will fix the problem.

— Stretch frame to all corners: Useful for projects using anamorphic media. Clips of differing resolutions are squished or stretched to match the frame size in all dimensions. This way, anamorphic media can be stretched to match full raster or full raster media can be squished to fit into an anamorphic frame. An added benefit of this setting is that it makes it easy to mix anamorphic and non-anamorphic clips in the same project.

Output Image Scaling Project Settings
Another group of settings found in the Image Scaling panel of the Project Settings lets you optionally choose a different resolution to be output, either via the Deliver page, or via your video output interface for monitoring or outputting to tape.
In particular, if you set the “Resolution” in the Render Settings panel of the Deliver page to something other than the timeline resolution, these settings are used to make the change. This is useful in situations where you’re mastering a high resolution 4K project, but you want to monitor using an
HD display, and you plan on eventually outputting HD resolution deliverables in addition to the 4K deliverables for which you want to use different Scaling and/or Resize Filter settings that work better at the lower resolution.
— Match timeline settings: This checkbox is turned on by default so that these settings mirror the Image Scaling and Input Scaling settings described above. Turning this checkbox off lets you
choose different settings to be used when monitoring, outputting to tape, or rendering, using the other settings below.