< Previous | Contents | Next >
There are two different ways you can set up the recording of automation for levels, panning, EQ, Dynamics, and other audio controls in the mixer.
Recording Automation for Multiple Tracks
You can use the following steps to record automated changes to any audio control in any control strip:
1 Open the Automation toolbar, and do the following three preparatory steps:
a) Choose whether you’re going to write new automation, or trim automation that’s already recorded. Write mode is appropriate when you’re recording automation for the first time, or when you’re overwriting previous automation with brand new values. Trim mode is appropriate when you’re making incremental changes to previously recorded automation.
Note that Trim mode works as a delta trim system only with fader positions at zero (unity) on Fairlight control surfaces at this time.
b) Next, choose Touch and On Stop behaviors that are appropriate for the kind of automation recording you need to do.
2 Move the playhead to the beginning of the section of the timeline you want to record automation for.
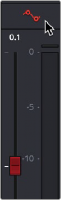
3 Next, initiate playback using any method (Spacebar, L, Play button, Fairlight or third-party audio control surface), and make whatever adjustments you want to the controls you’ve enabled automation recording for. As you make adjustments, the affected fader control turns red to let you know you’re recording automation.
4 When you’re finished, stop playback using any method (Spacebar, K, Stop button, third-party or Fairlight audio control panel). Automation recording stops as well.
Recording Automation for Specific Individual Tracks
You can use the following steps to record automated changes to controls in specifically armed control strips:
1 Open the Automation toolbar, and do the following three preparatory steps:
a) Choose whether you’re going to write new automation, or trim automation that’s already recorded. Write mode is appropriate when you’re recording automation for the first time, or when you’re overwriting previous automation with brand new values. Trim mode is appropriate when you’re making incremental changes to previously recorded automation.
b) Next, set Touch to Off, which disables across-the-board automation recording and requires you to arm specific tracks that you want to automate.
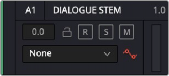
2 Click the automation arm button above the fader of any Mixer track or any track header to which you want to record automation. Even though the Touch control is set to off, moving a control on an armed channel strip will record automation in Latch mode.