< Previous | Contents | Next >
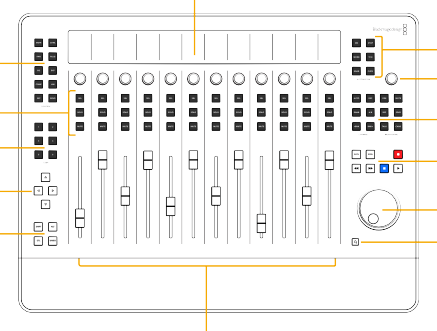
Control buttons
Channel buttons User buttons
Arrow keys
Modifier and undo keys
Automation buttons
Listening level control knob
Monitoring buttons Transport keys
Search dial Zoom key
12 Fader Channel Strip with control knob and buttons
Connecting to a Monitor via HDMI
For additional visual feedback, you can add an HDMI display to the Fairlight Desktop Console. There’s no configuration needed, simply plug in an HDMI monitor and start working! This allows you to see an extensive graphical display of everything happening on the console. The screen automatically switches between Strip, Channel, and Master layouts depending on the current control mode. Along the top
of the HDMI screen you’ll always see a fixed display that includes: timecode, monitoring controls, automation toolset, and the Bus, Control Room, and Loudness meters. While at the bottom of the screen you’ll see 12 sets of Channel Extension Buttons for quickly identifying channel status while you work.
![]()
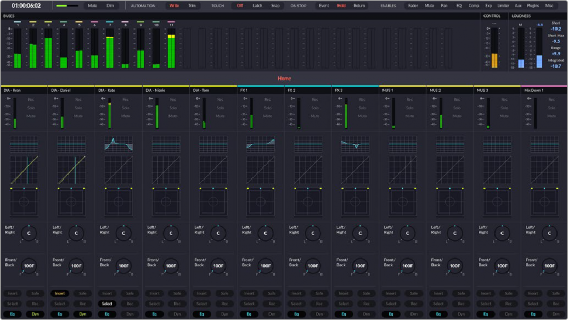
Optional HDMI monitor displaying Strip mode layout with an identical set of parameters in- line with each of the 12 channel strips, including from the top down: Track color, Name.
Level, Status, EQ, Dynamics, Panning controls, and Channel Extension buttons.
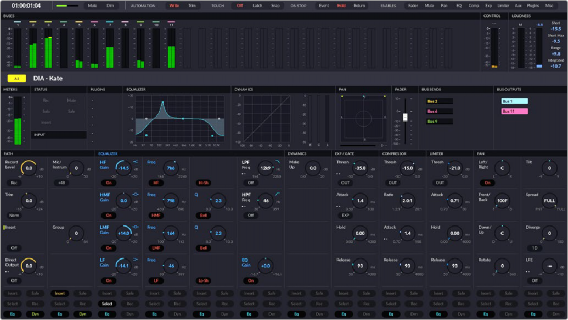
Optional HDMI monitor displaying the Channel Control mode layout, which includes 192 different parameters for the active channel. Parameter controls currently mapped to the LCD displays, knobs, and SEL buttons are highlighted with blue text.
![]()
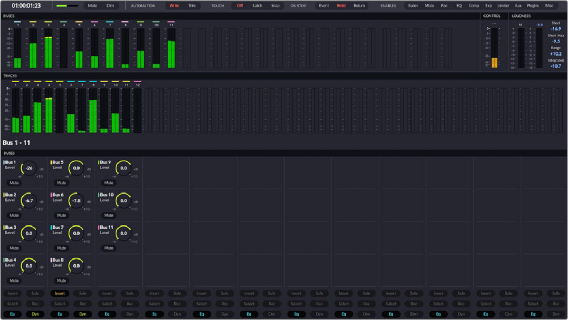
Optional HDMI monitor displaying the Master Control mode layout with bus meters, level, and mute for each of the master buses.

HDMI Fixed Monitoring section with timecode, monitoring controls, Automation toolset, Bus, Control Room, and Loudness meters.
