< Previous | Contents | Next >
Fairlight Desktop Console connected to a second monitor and the Fairlight Audio Editor with DaVinci Resolve computer screen
Performing Firmware Updates
Some DaVinci Resolve updates, such as 17.2.1, require firmware updates to implement the improvements to the Fairlight Desktop Console. To use the DaVinci Control Panels Setup utility for the first time, you need to perform a custom install of the latest version of DaVinci Resolve and in the custom settings, check the option to install the DaVinci Control Panels utility. Once installed, you can select any DaVinci Resolve panel connected to your system and perform network setup and firmware updates.
1 Quit DaVinci Resolve, if necessary.
2 Open the DaVinci Control Panels Setup utility.
The DaVinci Control Panels Setup Utility
3 In the DaVinci Control Panels Setup Utility, select the Fairlight Desktop Console.
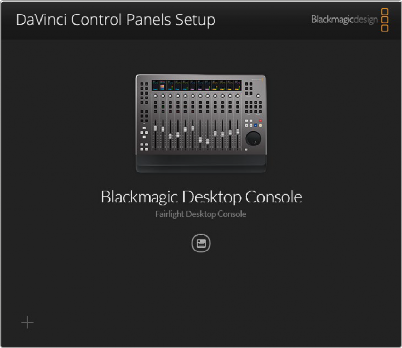

NOTE: If you are working with the Fairlight Desktop Console or Desktop Fairlight Audio Editor, there will only be one panel from which to choose.
NOTE: If you are working with the Fairlight Desktop Console or Desktop Fairlight Audio Editor, there will only be one panel from which to choose.
NOTE: If you are working with the Fairlight Desktop Console or Desktop Fairlight Audio Editor, there will only be one panel from which to choose.
4 Click the circled icon below the panel name.
5 If there is a firmware update available, you will see an update dialog.
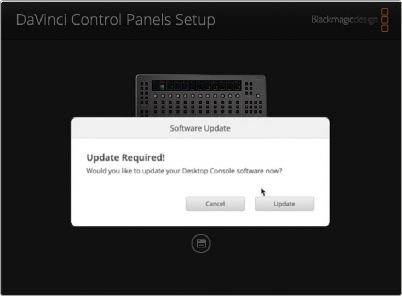
![]()
Firmware Update Available dialog
6 Click Update to install the updated firmware on that panel.
7 Once the update is complete, click Done.
8 Close the DaVinci Control Panels Setup.
9 Open DaVinci Resolve.