< Previous | Contents | Next >
Matching Media From Left and Right Eyes
To help you manage the visual differences between left- and right-eye clips, there are also three automatic color matching commands that can be used to batch process as many clips as you need to adjust at once.
— Stereo Color Match (Primary Controls): Uses the Lift/Gamma/Gain controls to match one eye to the other. The result is a simple adjustment that’s easy to customize, but may not work as well as Custom Curves in some instances.
![]()
— Stereo Color Match (Custom Curves): Uses the Custom Curves to create a multipoint adjustment to match one eye to the other. Can be more effective with challenging shots.
— Stereo Color Match (Dense Color Match): Performs a pixel by pixel, frame by frame color match that is incredibly accurate. This operation is processor intensive, so if you’re going to batch process many clips, or if you’re matching long clips, you’ll want to make sure you have adequate time. Because this is such a precise match, it’s recommended to use Dense Color Match after you’ve used one of the stereo alignment commands.
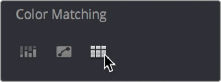
Controls for matching the grade of the left and right eye media
Step 5—Output Offline or Online Media for Editing
When you’re done applying whatever grading is necessary to make the media suitable for editing, you’ll need to export each clip as separate left- and right-eye clips using the controls of the Deliver page.
1 Open the Deliver page, and set up your render to output the format of media you require. Be sure to do the following:
— Set Render Timeline As to Individual source clips.
— Turn on the “Filename uses Source Name” checkbox.
— To render both eyes’ worth of media, choose “Both eyes as” from the Render Stereoscopic 3D option, and choose Separate Files from the accompanying pop-up menu. Optionally, you could also choose to render only the left-eye or right-eye media.
2 Choose how much of the Timeline to render from the Render pop-up menu in the Timeline toolbar; to render everything, choose Entire Timeline.
3 Click “Add Job to Render Queue.”
4 Click Start Render.
DaVinci Resolve will now render either two sets of left- and right-eye clips, or one set of media corresponding to the eye you chose.