
< Previous | Contents | Next >
— Batch Clips: A way you can log multiple clips in advance of scanning them all at once using the current light source settings in DaVinci Resolve’s film scanner panel. Log each clip in advance by setting In and Out points for each section of film you want to scan, and click the ‘log clip’ button to save that frame range as an unscanned clip in the media pool. When you click ‘batch clips’,
NOTE: When you click the ‘log clip’ button, Cintel Scanner applies the same project settings to all clips in the batch, and uses the newest project settings at the time
of capture. You are advised to confirm the scanner settings before starting the batch capture.
NOTE: When you click the ‘log clip’ button, Cintel Scanner applies the same project settings to all clips in the batch, and uses the newest project settings at the time
of capture. You are advised to confirm the scanner settings before starting the batch capture.
NOTE: When you click the ‘log clip’ button, Cintel Scanner applies the same project settings to all clips in the batch, and uses the newest project settings at the time
of capture. You are advised to confirm the scanner settings before starting the batch capture.
all unscanned clips will be scanned one after the other until the job is complete. You can also select one or more unscanned clips, and only the selected clips will be scanned. Furthermore, you can import an EDL that corresponds to a particular film roll, and use the resulting logged clips for scanning.
![]()
If ‘Enable 2 Pass HDR Scan’ is selected, the high intensity HDR scan uses the same sets of In and Out points as the initial batch of scans.
For more information on batch capture workflows, see Chapter 24, “Ingesting From Tape.”
— ![]() Snapshot: Capture a single frame with normal exposure and current scanner settings.
Snapshot: Capture a single frame with normal exposure and current scanner settings.
Once scanning, if DaVinci Resolve detects that your storage bandwidth is too low to capture at the selected speed, the scan speed will automatically adjust to ensure the capture is successful. If you are using the optional Audio and KeyKode Reader accessory, the audio sample rate will also be adjusted to maintain your chosen audio quality.
Extracting Audio
If the film you’re scanning also contains an optical sound track, you can extract the audio in a separate step. There is a standard image frame to audio frame offset of 26 frames for 16mm and 21 frames
for 35mm that DaVinci automatically aligns when extracting the audio. Select all of the clips that have an optical sound track, then right-click one of the selected clips and choose ‘extract audio’. Resolve analyzes the overlapping optical track area of each frame and automatically generates a matching audio track, synchronized with the scanned image sequence.
Each clip’s audio will be automatically extracted, embedded in the clip and saved to the same directory the scanned frames have been written to. A small audio icon will appear on the corner of your clip’s thumbnail so you know there is a corresponding audio file.
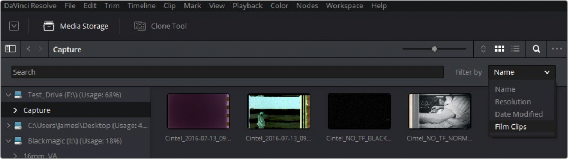
To make extraction easier, you can filter the clips in the media storage by name, resolution, date modified or by film clips only. Filtering your clips makes it easier for you to find and select exactly what you need. You can also make a large selection and extract audio from multiple clips at once by right clicking on your selection and choosing ‘extract audio…’ from the menu. During audio extraction, an information box indicates the progress. You can click the ‘stop’ button any time to stop the extraction.
![]()