< Previous | Contents | Next >
Refer to your ATEM’s specific documentation for how to set up ISO recording, but one important setting is to make sure that you’ve checked the “ISO Record All Inputs” setting in the ATEM software control before you start shooting.
1 (Before you shoot) Check the “ISO Record All Inputs” setting in the ATEM software control.
2 At this point, record your show using the ATEM device, and note the project’s folder location.
3 Select File > Import Project.
4 Select the DaVinci Resolve Project file (.drp) in the ATEM project folder, in the file browser.
![]()
5 Click on the Open button.
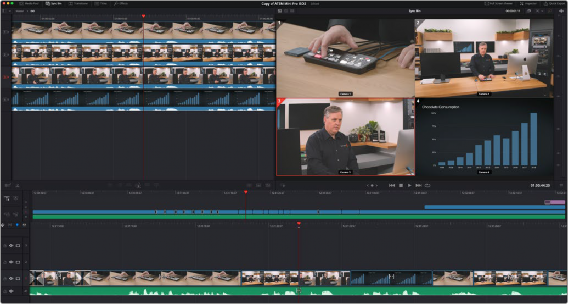
An ATEM Mini Pro project opened in the Cut page Sync bin
Relinking Blackmagic Camera Masters to ATEM ISOs
The ATEM records each camera’s ISO as an H.264 HD video stream, which may not be of high enough resolution or quality for some purposes. It’s possible to instantly switch your ATEM camera ISOs to the original camera recordings made in a Blackmagic Camera instead. This workflow enables the highest visual quality of Blackmagic RAW and the ability to output in higher resolutions (such as 4K or UHD) than are supported by the ATEM internally. Essentially, the ATEM can reference an additional set of higher quality ISOs recorded in the cameras, rather than those from the ATEM itself. This feature is only available using Blackmagic Cameras.
This workflow requires one more step in the process, namely making sure that you have sufficient recording space attached to each camera to record the show in its entirety. Refer to your ATEM’s specific documentation for how to set up ISO recording and camera control, but one important setting is to make sure that you’ve checked the “ISO Record All Inputs” and the “Record in All Cameras” settings in the ATEM software control before you start shooting.