< Previous | Contents | Next >
Setting Up and Performing Edits
No matter what kind of edit you intend to make, the process of setting them up and performing them is the same. This section describes the general process of setting up an edit, and the following sections will describe how each particular edit works.
1 First, locate a clip you want to edit into the Timeline. There are two general ways of doing this:
a) Open a bin with clips you want to use, then click the Source Tape in the Viewer to show a stringout of all clips in the current bin, and its subfolders, in the currently selected sort order. Now, you can scrub around all these clips using JKL or the DaVinci Speed Editor’s shuttle/jog/ scroll wheel to find the media you’re looking for.
b) Open a bin with clips you want to use, and navigate the thumbnails, filmstrips, or columns to select the clip you want, using the Search field if necessary to help find the clip you’re looking for.
![]()
2 Scrub a thumbnail or filmstrip, or use the controls in the Viewer, or use the controls of your DaVinci Speed Editor to locate frames at which you want to set In and Out points to define an edit range, and use the I (In) and O (Out) keys to set those points.
3 If necessary, choose which video track you want to edit to by clicking in its track header to select it. Selected tracks are highlighted.
4 Perform an edit to put the selected range of the source clip into the selected video track at the desired frame, using either the buttons at the bottom of the Media Pool, or keyboard shortcuts. Different edit commands will put the source clip into different locations.
5 After you’ve committed your edit, you can press Q (or click the Timeline Viewer button) to switch the Viewer to the Timeline to play and review the edit you’ve just made, and then press Q again to switch back to the Source Clip or Source Tape (whichever was last used) to locate the next clip you want to edit, starting all over again at Step 1.
Smart Insert
Automatically inserts an incoming clip at the closest edit point to the playhead (as shown by the Smart Indicator) on the selected track, pushing all clips to the right of the edit point forward to make room for the incoming clip if you’ve inserted to Track 1. Because this is a smart operation, you are prevented from inserting a clip at any arbitrary frame; incoming clips are only inserted at the closest previously existing edit point.
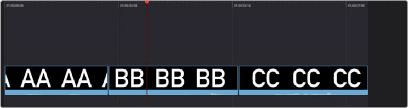
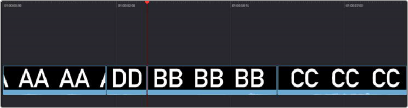
(Top) Before doing a Smart Insert, (Bottom) After inserting clip DD between clips AA and BB