
< Previous | Contents | Next >
want to get a closer look at the underlying video in the background. Each track has Mute and Enable controls, while audio-only tracks only have Mute controls. White controls are enabled, while gray controls are disabled.
Track 1 is disabled; the Enable button is orange and clips on the track are dimmed
Audio Trim View
![]()
When performing a trim operation in the Cut page, you can set the option to expand the audio waveform of a Timeline clip while trimming. This mode gives a much more accurate view of the audio, making it easier to pick a specific edit point between words, beats, etc.
— Click the Timeline Options icon, and check Trim to Audio.
With this option enabled, you’ll see an expanded waveform for audio/video clips that are being trimmed in the Timeline, while you’re trimming. This shrinks back down after you finish the trim operation.
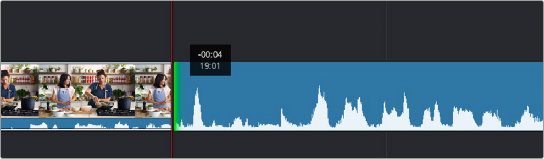
The Audio Trim view showing an expanded audio waveform while trimming in the Timeline
Timeline Markers
You can place markers in the Timeline Ruler (of both the Upper Timeline and the Timeline Editor) to keep track of important frames of clips you want to remember, alternate edit points you’re thinking of, key moments in the edit, or to make notes of things you need to do. You can edit marker text, which appears as an overlay in the Viewer, and you can change the color of markers to distinguish them from one another.
The Marker button in the Timeline track header