< Previous | Contents | Next >
Removing or Changing Subclip Limits
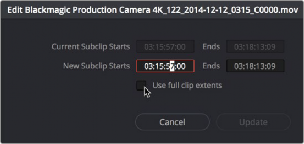
Once created, you can right-click any subclip in the Media Pool or a timeline and choose Edit Subclip to open a dialog in which you can turn on a checkbox to use the subclip’s full extents, or to change the start or end timecode of the subclip via timecode fields, before clicking Update to modify the subclip.
The Edit Subclip dialog
Audio Transcription and
Text Based Editing (Studio Version Only)
![]()
The most critical metadata about any clip is knowing what people have said in it. A full transcription of a shot is useful in narrative film letting you find specific clips based on the dialog in the script, but a transcript is especially important in unscripted documentary and news production, both to
understand what pieces of the story you actually captured and for a variety of organizational, creative and legal requirements.
Until recently, transcribing audio was a labor-intensive process requiring a human being to listen to a clip in real time and then type out what was being said in a log sheet. With recent advances in the DaVinci Resolve Neural Engine, your computer can now perform the tedious work of transcribing each clip for you automatically, and most importantly, accurately. In addition, having text transcripts
attached to the clips in your project gives you powerful new text-based editing tools to select, search and insert clips into your timeline.
Transcribe Audio
The Transcribe Audio feature is accessed via the Media Pool in the Media, Cut, Edit, and Fairlight pages and is a fully automated process.
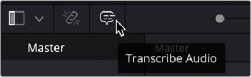
The Transcribe Audio icon in the
Media and Edit pages
1 Select a clip or clips with audio to transcribe in the Media Pool.
2 Right-click on any of the selected clips and select Audio Transcription > Transcribe from the contextual menu. Or click on the Transcribe Audio icon in the Media Pool toolbar.
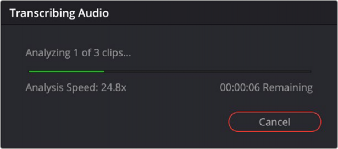
The Transcribing Audio Window
At this point the Transcribing Audio window will appear, showing you how many clips are left to analyze, the speed at which the analysis is taking place vs. real time, and approximately how
![]()
much longer the analysis of the selected clips will take. There is a button to cancel this operation at any time.
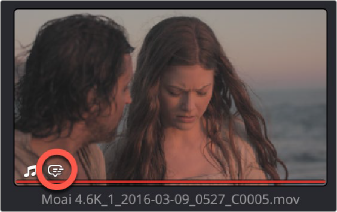
The speech balloon icon showing that a clip has been transcribed
Any clip that has a transcription attached to it will have a small speech balloon icon appear in the lower left of its thumbnail in the Media Pool.
1 Select a clip you want to delete the transcription from in the Media Pool.
2 Right-click on the selected clips and select Audio Transcription > Clear Transcription from the contextual menu.
Audio Transcription of Timelines
Audio Transcription works not just with clips but for timelines as well and in the same way as described above. There are several practical uses for a text transcription of a timeline for legal and organizational requirements. However, if you’re intending to make subtitles or captions for the Timeline, there is a dedicated tool specifically for that purpose. For more information on the Create Subtitles from Audio feature, see Chapter 52, “Subtitles and Closed Captioning.”