< Previous | Contents | Next >
Place on top edits create new timeline tracks if necessary, and do not ripple the Timeline.
1 To choose where in the Timeline the clip will be “placed on top,” do one of the following: Move the playhead to intersect the clip you want to edit the incoming source clip on top of.
Set In and Out points in the Timeline to define the duration within which you want to place the incoming source on top.
2 Set In and Out points in a source clip that you want to edit.
3 Choose Edit > Place on Top, drag any clip onto the Place on Top overlay in the Timeline Viewer, or press F12.
![]()
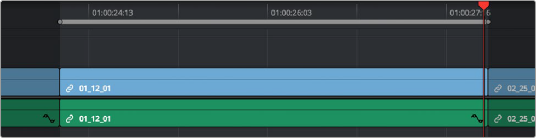
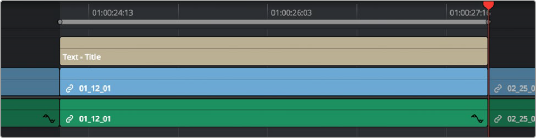
Before and after using place on top, the incoming text generator is superimposed to a track above the clip at the position of the playhead
Incoming video clips will be edited to the topmost video track so they are above any previously existing video in the Timeline. Incoming audio clips are edited to the bottom-most audio track so they are below any previously existing audio. If necessary, new video and/or audio tracks will be created automatically to hold the new incoming clip.
Ripple Overwrite
Ripple Overwrite is a four-point edit that’s useful when you can identify a segment of the Timeline you want to overwrite, but the incoming clip is of a different duration and you want DaVinci Resolve to automatically ripple the Timeline to accommodate the difference.
You can use the Ripple Overwrite command one of two different ways:
— You can overwrite an entire clip in the Timeline with another clip of different length.
— You can overwrite a section of the Timeline marked with In and Out points with a another clip of different length.
In both cases, all clips to the right of the clip or timeline section being overwritten are rippled to the right or left to make room or fill the gap. Because of this, the ripple overwrite edit will most likely change the overall duration of your edited sequence of clips.
Using Ripple Overwrite on an Entire Clip in the Timeline
Using ripple overwrite as an automatic four-point edit, you can overwrite whichever clip in the Timeline intersects the playhead on the tracks defined by the destination controls, in its entirety, with the incoming clip. For this to work, there must be no In or Out points set in the Timeline.
After performing a ripple overwrite in this way, the original timeline clip is eliminated and the incoming clip takes its place, and all clips to the right of the clip being replaced are either (a) rippled to the right if the incoming clip is longer than the original timeline clip, or (b) rippled to the left if the incoming clip is shorter than the original timeline clip. All of this is done in a single step.
This is useful in situations where you want to quickly switch one clip in the Timeline with another of unequal duration and have the Timeline automatically make room to allow this all in one step.
1 Move the playhead in the Timeline to intersect the clip that you want to replace; the playhead’s exact position is not important.
2 Click the appropriate audio and video destination controls of the track containing the clip you want to replace, and press Option-X to eliminate any In and Out points there might be in the Timeline.
3 Open a clip into the Source Viewer, and set In and/or Out points as necessary to define how much of the clip you want to edit into the Timeline.
![]()
4 To execute the edit, choose Edit > Ripple Overwrite, drag the clip to the Ripple Overwrite overlay of the Timeline Viewer, or press Shift-F10.
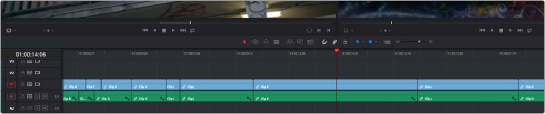
Before and after of using ripple overwrite with no Timeline In or Out points; Clip K at the position of the playhead is replaced in its entirety by the short segment of Clip U from the Source Viewer; all clips with In points to the right are rippled to the left to fill the gap
Using Ripple Overwrite on a Section of the Timeline Defined by In/Out Points
You can also use ripple overwrite as an explicit four-point edit, to overwrite a section of the Timeline that’s marked with In and Out points with an incoming clip that’s also marked with In and Out points that is of unequal duration.
After performing a ripple overwrite in this way, the section of the Timeline marked with In and Out points is eliminated and the incoming clip takes its place, and all clips to the right of the clip being replaced are either (a) rippled to the right if the incoming clip is longer than the original timeline clip, or (b) rippled to the left if the incoming clip is shorter than the original timeline clip. All of this is done in a single step.
A good example of when this can be useful is when you’re cutting a close-up of an actor performing a particular action into a medium shot of the actor performing the same action that’s already in the Timeline, and the action you’re matching is of different durations in each of the shots.
1 Set In and Out points in the Timeline to mark what part of the clip or clips you want to overwrite. You must set both In and Out points for this to work as expected. In this example, the part of the clip where the woman leans forward is marked.

![]()
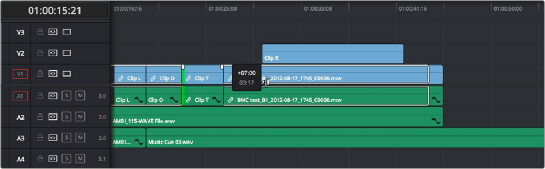
Setting In and Out points to identify an action in the Timeline that you want to overwrite with another clip that has a matching action
2 Open a clip into the Source Viewer, and set In and/or Out points as necessary to define how much of the clip you want to edit into the Timeline. In this example, a section of the woman’s close up where she leans forward in a way that matches the same movement in the wider shot is marked.
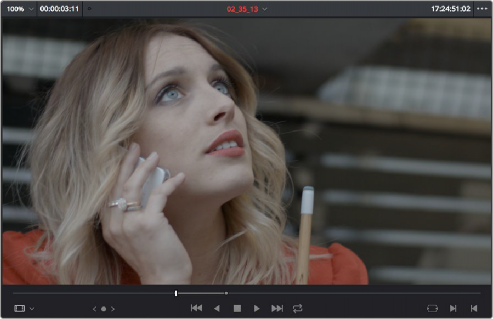
Setting In and Out points to identify an action in a source clip that you want to overwrite the action you’ve marked in the Timeline. It’s a matching action, but the timing might be different, and that’s okay with this kind of edit.