< Previous | Contents | Next >
— To filter all flagged clips in the Edit Index: Click the Option menu of the Edit Index and choose Show Flags. Each flagged clip appears in a list, with a column showing the color(s) of the flags applied to each entry in the list.
Using Markers
Markers are used to call attention to a particular frame within a specific clip. Markers can be individually colored, and can have customized name and note text. Whenever you enter text into a marker, that marker displays a small dot that indicates there’s more information inside of it. Once placed, markers snap to In and Out points, edit points, the playhead, and other markers whenever snapping is enabled, making it easy to use markers to “measure” edits and trims that you make in the Timeline.
Adding Markers to Clips
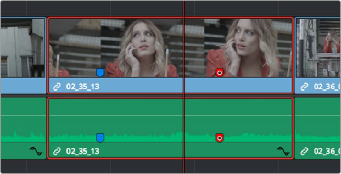
![]()
You can place markers on the jog bar of source clips in the Source Viewer (or in the Media page Viewer), and on clips that are selected within a timeline.
(Top) Markers placed on a source clip,
(Bottom) Markers placed on a clip in the Timeline
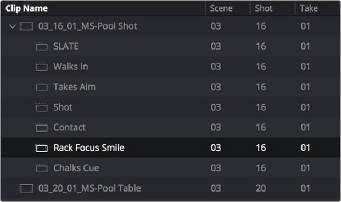
When you add markers to a source clip, those markers also appear in the Media Pool as hierarchically disclosable items attached to that clip in List view (markers are not visible in Thumbnail view). More information about using markers in the Media Pool’s List view appears later in this chapter.
Markers can be viewed as separate clips identified by marker name when the
Media Pool is set to List view