< Previous | Contents | Next >
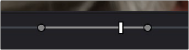
1 Set In and Out points in the Source Viewer jog bar to identify a region you want to log for future reference.
Marking In and Out points in preparation to log that section of the clip
2 Do one of the following:
— Right-click the jog bar and choose Convert In and Out to Duration Marker
— A marker with duration appears above the In and Out points. To edit its name or notes, double-click the marker, press Shift-M, or choose Mark > Modify Marker.
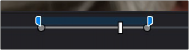
A marker with duration is created from the In and Out points
![]()
In this way, you can log several regions within a single clip for future use.

A clip with multiple logged sections identified via markers with duration
This an extremely useful logging technique for two reasons. First, markers with duration can be searched for in the Media Pool using the All Fields, Marker Name, and Marker Notes Filter by options. Second, they can be filtered with Smart Bins using the Marker Name and Marker Notes Media Pool Properties options.
Editing Marker Information and Keywords
Once you’ve added some markers, you may want to edit their contents to make them more useful.
1 Do one of the following:
— Press Command-M to add a marker during playback and immediately open its edit dialog.
— Double-click any marker you want to edit.
— Move the playhead to the frame containing the marker you want to annotate using Shift-Up Arrow/Down Arrow and press M.
— Select a marker anywhere in the Source Viewer or Timeline, and press Shift-M.
2 When the marker dialog opens, you can modify several properties in separate fields. For fast editing, you can press Tab to select the next field, or you can press Shift-Tab to select the previous field.

Editable properties in the Marker dialog
— Time: The frame the marker is positioned at relative to that clip or timeline. This is editable, so you can numerically change a marker’s position.
![]()
— Duration: Optional; the length of a marker that’s been assigned a duration. This is also editable, so you can numerically assign a duration to a marker or alter a marker that already has duration.
— Name: The name of the marker, defaults to the number of that marker in the order it was added (Marker 1, Marker 2, etc.).
— Notes: A field where you can enter any information you want to keep track of.
— Color: A series of buttons for choosing the color of the marker.
— Keyword: A keyword field lets you keyword markers in the same way you can keyword clips in the Metadata Editor, which can be a powerful way of identifying sections of clips you want to find later in Smart Bins or Search operations. Typing text in the Keyword field automatically searches the dictionary for matching keywords. Press Return to accept a found keyword (you can choose from a list using the Arrow keys), or press the Up Arrow key back to the Keyword
field to manually enter your own new variation instead. For more information about using and editing Keywords, see Chapter 16, “Using Variables and Keywords.”
— Remove Marker: Deletes that marker.
— Done: Closes the marker edit dialog.
3 When you’re finished, click Done.
Once you add notes to a marker, a small symbol appears on top of that marker to show you it has information.
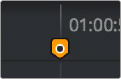
A small dot on a marker shows that it contains notes