< Previous | Contents | Next >
Clip and Timeline markers as seen in the Mini-Timeline of the Color page
Once you’ve added one or more markers placed on clips, snap to clip In and Out points, edit points, the playhead, and other markers whenever snapping is enabled.
— Press M.
— Click the Marker button to place a marker of the currently selected color in the Timeline ruler.
— To place a marker during playback and immediately open the marker dialog to enter a name or note within it, select one or more clips you want to mark, then press Command-M
(or press M twice). Playback pauses until you enter some text and close the marker dialog again, at which point playback continues.
— Click the Marker drop-down to choose a different color, and click the Marker button.
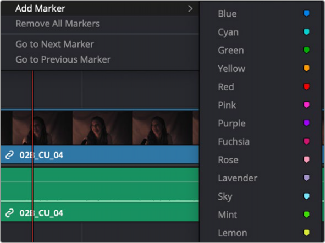
— Right-click in the Timeline ruler and choose a marker color from the Add Marker submenu of the contextual menu.

![]()
— Choose Mark > Add Marker > Current Color (M) to add the current marker color. Alternatively, you can choose Mark > Add Marker > Blue/Cyan/Green/and so on to add a marker of a specific color directly to clips or the Timeline. These commands can be assigned specific keyboard shortcuts if you want to be able to place a specific marker color at a keystroke.
Saving In and Out Point Ranges As Markers with Duration
Individually mappable marker color commands
You can also create markers with duration to keep track of any region of a clip or timeline that you’ve defined with In and Out points. This lets you identify multiple regions of a clip that you might later want to edit into a program.