< Previous | Contents | Next >
When you select an edit point with both video and audio components, and Linked Selection is enabled so that both the video and audio edit points are selected, then when you apply a video transition to an edit, a crossfade is added to the audio.
You can add Cross Fade transitions to any edit point between two audio clips that have enough handles similarly to how you add video transitions, by dragging and dropping from the Effects Library, by right-clicking an edit and choosing an option from the contextual menu, or by selecting an audio edit point and choosing Timeline > Add Audio Only Transition (Shift-T).
Cross Fade transitions are a quick and easy way to fade the volume of the outgoing clip down while simultaneously fading the volume of the incoming clip up, letting you create a smooth aural transition between two audio clips. If you need to do precision editing, the start and end points of a crossfade can be edited in sub-frame increments.
![]()
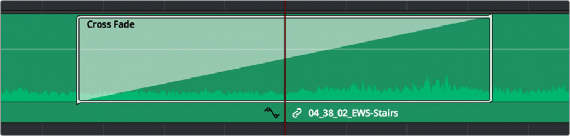
An audio Cross Fade transition applied between two clips
You can double-click a Cross Fade transition to open it into the Inspector, revealing the following parameters:
— Duration: The duration of the transition, shown in both seconds and frames.
— Alignment: A drop-down that lets you choose the transition’s position relative to the edit point it’s applied to. Your choices are “End on Edit,” “Center on Edit,” and “Begin on Edit.”
— Transition style: You can choose –3dB, 0dB, or +3dB to set both the Fade In and Fade Out levels to the same value. For more information on what these levels mean, see the following parameter.
— Fade In/Fade Out levels: There are three options that affect the incoming and outgoing halves of the Cross Fade effect independently. 0dB applies a linear fade (this is the default). +3dB applies a boosted curve; when applied to both Fade In and Fade Out, this can compensate for diminished levels in the middle of a Cross Fade. –3dB applies an attenuating curve, which deliberately lowers the level of the Cross Fade.

TIP: If you need an asymmetrical crossfade, that’s accomplished by “checkerboarding” clips on two tracks with overlapping handles at the beginning and end, and using the Fader handles to create exactly the timing and curves necessary to create the effect you require.
TIP: If you need an asymmetrical crossfade, that’s accomplished by “checkerboarding” clips on two tracks with overlapping handles at the beginning and end, and using the Fader handles to create exactly the timing and curves necessary to create the effect you require.
TIP: If you need an asymmetrical crossfade, that’s accomplished by “checkerboarding” clips on two tracks with overlapping handles at the beginning and end, and using the Fader handles to create exactly the timing and curves necessary to create the effect you require.
Crossfades can be created and edited on both the Edit and Fairlight pages.