< Previous | Contents | Next >
Composite modes can be used on clips that are superimposed over other clips in the Timeline. However, these composite modes are also available for use within a grade on the Color page using the Layer Mixer node, within which you can combine differently graded versions of an image in creative ways. For example, the Add and Overlay composite modes can be useful for creating glow effects, while Subtract and Difference can create more surreal effects.
Working with composite modes in the Edit page is simple.
— Select a clip in the Timeline, then open the Video Inspector and choose one of the options from the Composite Mode pop-up menu.
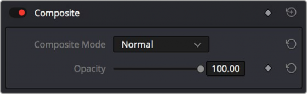
Composite mode and Opacity controls in the Timeline
![]()
— Select a clip in the Timeline, then open the Inspector and choose Normal from the Composite Mode pop-up menu.
More About Composite Modes
There are ten composite modes to choose from. For clarity, simple image math is used to help explain the available Composite Mode effects.
Normal
No image compositing is done. The topmost image on the Timeline or the bottom input of the Layer Mixer node occupies the entire frame.
Add
Each pair of pixels in both superimposed layers is added together. Layer order does not matter. This can result in a dramatic brightening of light areas of both images with areas of the picture that are blown out to maximum white, and this effect is often used by adding the brighter part of an image to itself to create hot glow effects. Image data going above 1.0 is preserved and may be retrieved by later color correction operations. On the other hand, black areas of either image do not alter the combined image at all (0 + n = n).
Color
Recombines two layers using HSL image components by combining the Luma of the bottom layer with the Hue and Saturation of the top layer.
Color Burn
Inverts the bottom layer, which is divided by the top layer, and the end result is itself inverted.
Color Dodge
The bottom layer pixels are divided by the top layer, which has been inverted.
Darken
Each pair of pixels in each color channel is compared, and the darker of the two is the output. Layer order does not matter. Darken is useful when you want the darker features of both layers to take precedence, but the output for any given pixel may be a color that doesn’t actually exist for that pixel in either of the source layers.
Darker Color
For each pair of pixels, all three color channels from the bottom layer are added together, and all three color channels from the top layer are added together. These results are compared, and the darker pixel of the two layers is the output. Layer order does not matter. Darker Color is useful when you want the darker features of both layers to take precedence. Unlike the Darken composite mode, the result will always be a specific color from either the bottom or top layers.
Difference
The absolute value is taken of the top layer minus the bottom layer, and returned as the result, which is always a positive number. Layer order does not matter. This Blend mode is often used to compare two differently processed versions of the same image to see if there are any alterations, and how large they are.
![]()
Divide
Divides the bottom layer by the top layer. Any color divided by itself = 1.0, or white, while any color divided by white (1.0) = itself.
Exclusion
Similar to the Difference composite mode, but results in lower contrast.
Hard Mix
The R, G, and B channel values of the bottom layer are added to the R, G, and B channel values of the top layer. Layer order does not matter. Can result in extreme effects.
Hardlight
Hardlight is the opposite of Overlay. All bottom layer pixels above 50% are Multiplied, while all bottom layer pixels 50% and below are Screened.
Hue
Recombines two layers using HSL image components, by combining the Luma and Saturation of the bottom layer, with the Hue of the top layer.
Lighten
Each pair of pixels in each color channel is compared, and the lighter of the two is the output. Layer order does not matter. Lighten is useful when you want the lightest features of both layers to take precedence, but the output for any given pixel may be a color that doesn’t actually exist for that pixel in either of the source layers.
Lighter Color
For each pair of pixels, all three color channels from the bottom layer are added together, and all three color channels from the top layer are added together. These results are compared, and the lighter pixel of the two layers is the output. Layer order does not matter. Lighten Color is useful when you want the lighter features of both layers to take precedence. Unlike the Lighten composite mode, the result will always be a specific color from either the bottom or top layers.
Linear Burn
Each pair of pixels is summed, and 1 is subtracted from the total. Layer order does not matter. Regions of white in one layer let the other layer show through, while colors and darker tones from both layers interact to tint or darken the resulting image.
Linear Dodge
Each pair of pixels is summed. This composite mode is identical to Add.
Linear Light
All regions where the bottom layer is above 50% are Linear Dodged so as to lighten these parts of the final result, while all regions where the bottom layer is below 50% are Linear Burned so as to darken these parts of the final result. This composite mode intensifies image contrast in the final result.
Luminosity
![]()
Recombines two layers using HSL image components by combining the Hue and Saturation of the bottom layer with the Luma of the top layer.
Multiply
Each pair of pixels is multiplied together. Layer order does not matter. This generally has the effect of emphasizing the darkest parts of both images in the resulting output; in particular black areas of either image are preserved (0 * n = 0) while white areas of either image have no effect on the output image (1 * n = n). Multiply is good for compositing darker elements in a field of white into an image, and can be used to emphasize the darkest parts of a noise, grain, or damage layer you’re blending with an image.
Overlay
Overlay combines useful aspects of both the Screen and Multiply composite modes, based on the pixel values of the bottom-most image on the Timeline; all bottom layer pixels above 50% are
Screened, while all bottom layer pixels 50% and below are Multiplied. Overlay is an excellent composite mode for combining a layer of noise, grain, or damage imagery with another clip, as it combines both images in visually useful ways throughout the tonal range of shadows through highlights.
Pin Light
In regions where bottom layer pixels are below 50% gray, lighter pixels in the top layer are replaced by darker pixels from the bottom layer, and darker pixels in the top layer replace lighter pixels in the bottom layer, so that the darker half of the final image combines darker pixels from both layers. In regions where bottom layer pixels are above 50% gray, darker pixels in the top layer are replaced by lighter pixels from the bottom layer, and lighter pixels in the top layer replace darker pixels from the bottom layer, so that the brighter half of the final image combines lighter pixels from both layers.
Saturation
Recombines two layers using HSL image components, by combining the Luma and Hue of the bottom layer, with the Saturation of the top layer.
Screen
The pixel values of each layer are inverted, then multiplied, and the result is itself inverted. Layer order does not matter. Screen is the inverse of Multiply, as it preserves the lightest parts of both images, and is useful when compositing lighter elements in a field of black into an image, and can be used to emphasize the lightest parts of a noise, grain, or damage layer you’re blending with an image.
Softlight
A less intense method of applying the Hardlight composite mode that results in a more even blend between the two layers.
Subtract
Within each pair of pixels, those of the bottom layer are subtracted from those of the top. This can result in dark areas of the image that hit flat black, but image data going below 0 is preserved and may be retrieved by later color correction operations.
Vivid Light
![]()
All regions where the bottom layer is above 50% are Color Dodged so as to lighten these parts of the final result, while all regions where the bottom layer is below 50% are Color Burned so as to
darken these parts of the final result. This composite mode vastly intensifies both image contrast and saturation in the final result, for an extreme effect.
Foreground
When the Foreground composite mode is applied to the top layer, the transparency of its pixels is affected by a bottom layer in one of the following composite modes:
Alpha
The Alpha composite mode applied to the bottom layer affects the transparency of the top layer in a Foreground mode. The alpha of the layer is used.
Inverted Alpha
In the Inverted Alpha composite mode applied to the bottom layer, the transparency of the top layer in a Foreground mode is affected. However, this is based on the inverted alpha of the bottom layer.
Lum
When the Lum mode is applied to the bottom layer, it changes the transparency of the top layer in a Foreground mode. This is determined by the luminosity value of the pixels.
Inverted Lum
In the Inverted Lum mode, applied to the bottom layer, the transparency of the top layer in a Foreground mode is changed. This is based on the inverted luminosity value of the pixels.
Unknown
When importing XML or AAF project files with composite modes that aren’t available in DaVinci Resolve, the Composite Mode pop-up menu is set to Unknown; practically, this is the same as Normal.

TIP: To quickly audition different composite modes, hover your pointer over a mode in the Composite Mode drop-down list. That particular composite mode will preview in the viewer.
TIP: To quickly audition different composite modes, hover your pointer over a mode in the Composite Mode drop-down list. That particular composite mode will preview in the viewer.
TIP: To quickly audition different composite modes, hover your pointer over a mode in the Composite Mode drop-down list. That particular composite mode will preview in the viewer.