< Previous | Contents | Next >
The Spline Editor provides a more detailed environment for editing the timing, value, and interpolation of keyframes. Using control points at each keyframe connected by splines (also called curves), you
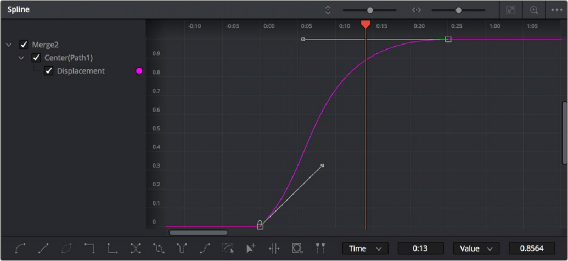
can adjust how animated values change over time. The Spline Editor has four main areas: the Zoom and Framing controls at the top, the Parameter list at the left, the Graph Editor in the middle, and the toolbar at the bottom.
The Spline Editor is divided into the Zoom controls at top, Parameter list at left, Graph Editor, and toolbar.
Spline Editor Control Summary
![]()
At the top, a series of Zoom and Framing controls let you adjust the work area containing the curves.
— Vertical and horizontal zoom controls let you scale the size of the editor.
— A Zoom to Fit button fits the width of all curves to the current width of the Spline Editor.
— A Zoom to Rect tool lets you draw a rectangle to define an area of the Spline Editor to zoom into.
A Timeline ruler provides a time reference, as well as a place in which you can scrub the playhead.
The Parameter list at the left is where you decide which splines are visible in the Graph view. By default, the Parameter list shows every parameter of every node in a hierarchical list. Checkboxes beside each name are used to show or hide the curves for different keyframed parameters. Color controls let you customize each spline’s tint to make splines easier to see in a crowded situation.
The Graph view that takes up most of this panel shows the animation spline along two axes. The horizontal axis represents time, and the vertical axis represents the spline’s value. Selected control points show their values in the edit fields at the bottom of the graph.
Lastly, the toolbar at the bottom of the Spline Editor provides controls to set control point interpolation, spline looping, or choose Spline editing tools for different purposes.