< Previous | Contents | Next >
The Timeline preferences is where you create and edit Keyframes Editor/Spline Editor filters and set default options for the Keyframes Editor.
![]()
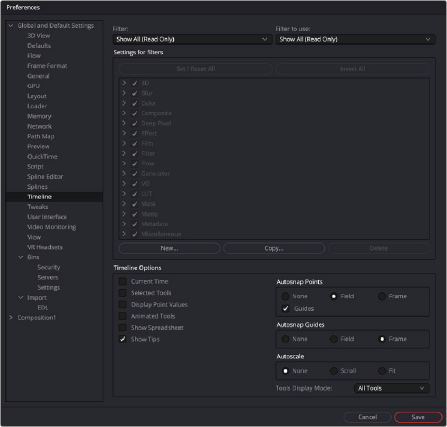
The Timeline preferences
Filter/Filter to Use
The Filter menu populates the hierarchy area below the menu with that setting. It lets you edit the filters. The Filter to Use menu selects the default filter setting located in the Keyframes Editor Options menu.
Settings for Filters
This area is used to create a new filter and define its settings. You start by first clicking the New button and entering the name of the new Filter. You then select any of the tools that you want the filter to contain. Only tools that are checked will appear in the Keyframes Editor or Spline Editor when the filter is selected. You can also create a copy of the filter using the Copy button or remove a filter from the list by clicking the Delete button.
Timeline Options
The Timeline Options configure which options in the Keyframe Editor are enabled by default. A series of checkboxes correspond to buttons located in the Timeline, allowing you to determine the states
of those buttons at the time a new comp is created. For more information on the Keyframes Editor functions, see Chapter 71, “Animating in Fusion’s Keyframes Editor,” in the DaVinci Resolve Reference Manual or Chapter 9 in the Fusion Reference Manual.