< Previous | Contents | Next >
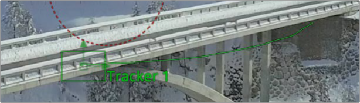
For now, clicking the Track from Beginning button will analyze the entire range of this clip, from the first frame to the last. A dialog lets you know when the analysis is completed, and clicking the OK button dismisses it so you can see the nice clean motion path that results.
The analyzed motion path resulting from tracking a section of the bridge as the camera flies past
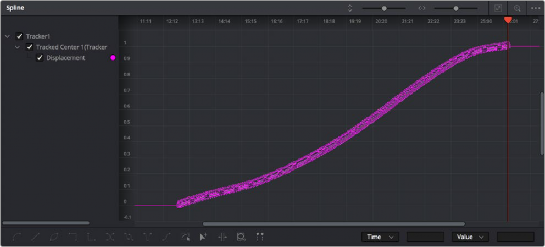
Viewing Motion Track Data in the Spline Editor
This is not a necessary part of the tracking workflow, but if you have an otherwise nice track with a few bumps in it, you can view the motion tracking data in the Spline Editor by viewing that tracker’s Displacement parameter curve. This curve is editable, so you can massage your tracking data in a variety of ways, if necessary.
![]()
Viewing motion tracking analysis data in the Spline Editor
Connecting Motion Track Data to Match Move
Now that we have a successful analysis, it’s time to use it to create the Match Move effect. To make this process easier, we’ll double-click the tracker’s name in the Tracker List of the Inspector, and enter a new name that’s easier to keep track of (heh). Adding your own names make that tracker easier to find in subsequent contextual menus and lets you keep track of which trackers are following which subjects as you work on increasingly complex compositions.
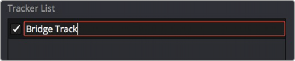
Renaming a tracker to make it easier to find
Now it’s time to connect the track we’ve just made to the text in order to start it in motion. After loading the Merge1 node into the viewer to see the text in context with the overall composite we’re creating, we’ll select the Text1 node to open its parameters in the Inspector, and click
the Layout panel icon (second button from the left) to expose the Layout controls, which are the text-specific transform controls used to position the text object in the frame. These are the
controls that are manipulated when you use the Text node onscreen controls for repositioning or rotating text.
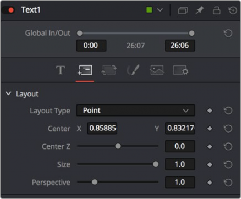
The Layout controls for a Text node, in the Layout panel
The Center X and Y parameters, while individually adjustable, also function as a single target for purposes of connecting to tracking to quickly set up match moving animation. You set this up via the contextual menu that appears when you right-click any parameter in the Inspector,
which contains a variety of commands for adding keyframing, modifiers, expressions, and other automated methods of animation including connecting to motion tracking.
![]()
If we right-click anywhere on the line of controls for Center X and Y, we can choose Connect To > Tracker1 > Bridge Track: Offset position from the contextual menu, which connects this parameter to the tracking data we analyzed earlier.
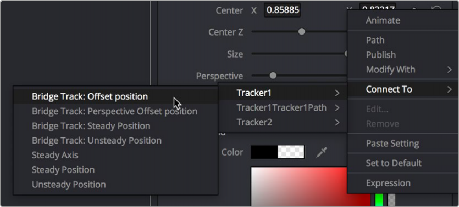
Connecting the Center X and Y parameter to the Bridge Track: Offset position motion path we analyzed
Immediately, the text moves so that the center position coincides with the center of the tracked motion path at that frame. This lets us know the center of the text is being match moved to the motion track path.