< Previous | Contents | Next >
This section covers the use of the Qualifier palette, which lets you pull a 3D, HSL, RGB, or Luma key, with which to isolate the correction you need. The Qualifier controls are fast and flexible when you need to isolate an irregularly shaped subject with a distinct range of color or lightness. Since you’re generating a key by sampling the image, there’s no need for tracking or keyframing, so in the right situation qualifiers can be your fastest solution. In the following example, the client likes the slightly cool treatment overall, but wishes that the skin tones were a little more vibrant. This is exactly the sort of situation where qualifiers can help out. Adding a second node, and using the 3D or HSL Qualifier to isolate the face makes it relatively simple to add color exactly where you want it.
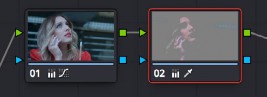
Adding a second node and using HSL Qualification to isolate the skin tones


The image with a simple primary correction The final adjusted image
![]()
Just about every control in the Color page can be limited using of the Qualifier modes available in DaVinci Resolve. This makes the Qualifier palette a jack-of-all-trades tool with 101 uses. A few practical examples include keying a red element that’s too intense for broadcast, in order to darken it or desaturate it; keying a range of green foliage, so you can shift its hue to a more attractive color; keying an actor’s skin tone in a commercial, to apply some selective softening to it; or keying a range of sky, in which to add blue.
The Qualifier palette is color-space-aware when you’re using Resolve Color Management (RCM) or ACES. This enables Qualifiers to create high-quality keys as you would expect, no matter what the color space of the original media is, or what Timeline Color Space you’re using, for both SDR and HDR mastering. This makes Qualifier isolations easier, and a more consistent experience no matter what your workflow happens to be.
Adding a Secondary Operation to the Node Editor
Any node can be switched between functioning as a primary correction, where the adjustments you make affect the entire image, and a secondary correction, where you’re adjusting a specific element in the scene. The only difference is that nodes being used for secondary corrections are limited using a qualifier, Power Windows, or an external matte.