< Previous | Contents | Next >
If you’re planning to add a secondary operation to the current grade, you’ll need to first add another node in the Node Editor. When pulling a key to qualify part of the image, it’s important to understand that you’ll be sampling the YRGB values being fed to that node from any previous nodes in the
tree. That means that the state of the image being fed to a node you’re qualifying affects the key you’re pulling.
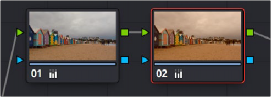
For example, if the image coming out of Node 1 is well saturated and has a neutral color balance with a wide range of colors, but the image coming out of Node 2 applies a low saturation,
monochromatically orange color wash, you may find it more difficult to pull a detailed key from Node 2 than you would from Node 1.
Choosing your battles–the image coming out of Node 1 will be easier to key than the highly stylized image coming out of Node 2
This is important because you have the flexibility of determining from what image you want to try pulling a qualified key. By connecting the node that’s outputting the best YRGB image for the key you’re trying to create to the node you’re qualifying, you can control what you’re keying.
For more information about choosing which node to use for setting up a qualifier, see Chapter 143, “Combining Keys and Using Mattes.”
The Qualifier Interfaces
![]()
The DaVinci Resolve Qualifier palette interface is straightforward. To the left, graphical controls above numeric parameters let you manually adjust what ranges of each color component contributes to the key you’re creating. To the right, Selection Range tools below let you define a key by sampling pixels of the image using the pointer, while below a set of Matte Finesse parameters let you alter the shape of the key that’s been pulled.
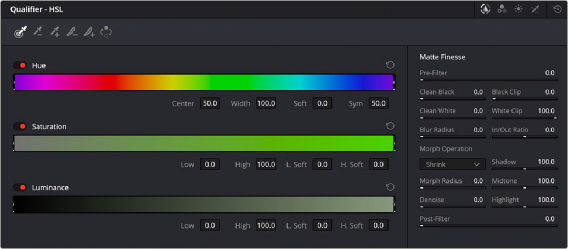
Qualifier palette with HSL controls selected