< Previous | Contents | Next >
If you don’t create a new node before creating a window, you’ll discover you’ve inappropriately changed a primary correction into a secondary correction. If you create a new serial node, you’ll then need to use the controls found within the Window palette to turn on a window to customize for your purposes. However, there are also a set of commands you can use to add serial nodes with a window already turned on, saving you a few clicks or button presses in the process.
— Choose Color > Nodes > Add Serial Node + CPW (Option-C) to create a new serial node with a circular window.
— Choose Color > Nodes > Add Serial Node + LPW (Option-Q) to create a new serial node with a linear window.
— Choose Color > Nodes > Add Serial Node + PPW (Option-G) to create a new serial node with a polygonal window.
— Choose Color > Nodes > Add Serial Node + PCW (Option-B) to create a new serial node with a Curve window.
When you add a node with a Power Window, the Window palette automatically opens up, ready for editing.
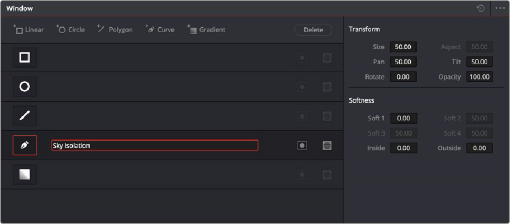
The Window palette
![]()
The Window palette is divided into three sets of controls: the Window list, the Presets, and the Transform and Softness controls.
The Window Palette Interface
Once you’ve created a node with which to apply a Power Window correction, you need to open the Window palette if it hasn’t been opened already.
— Click the Window palette button.
The majority of the Window palette is occupied by the Window list, within which you can create as many windows as you need for the task at hand. There are five types of windows you can create, each
of which has a different geometry. You can use these windows individually, or you can combine them to create even more complex shapes and interactions. The Window palette has four groups of controls that let you use these windows in different ways.
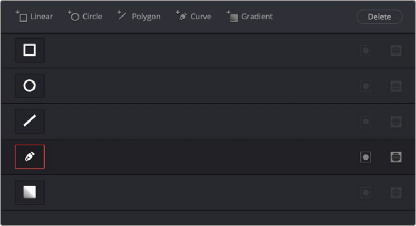
The Window palette with the Window list
— Window list: A row of buttons at the top of this list lets you add new windows, which you can then customize as necessary. Each window in the list exposes an On/Off button that shows the shape type, a Layer Name field (blank until you add some text) that you can use to identify what each window is for, an Invert button, and a Mask button that governs how that window interacts with the other windows that are currently enabled (adding to other windows by default, or subtracting from other windows in Mask mode).
— Transform parameters: Controls the overall size, aspect ratio, position, and rotation of the currently selected window.
— Softness parameters: Controls the edge softness of the currently selected window. Different window shapes have different softness options.
— Option drop-down menu: The Option drop-down menu has commands for creating and modifying custom window presets for easy recall later, resetting windows, deleting windows, saving and managing window presets, and copying and pasting track data.
Using buttons along the top of the Window palette, there are five types of windows you can create:
![]()
— Linear: A four-point shape that can be edited into any kind of rectangle or trapezoid you might need. In addition to the center and corner controls, you can also drag any of the four sides to change the shape.
— Circular: An oval that can be shaped, sized, and feathered to solve an amazing number of problems.
— Polygonal: A four-point shape that can be expanded with additional control points to create complex sharp-cornered polygonal shapes.
— Curve: A Bezier drawing tool that you can use to create any kind of shape, curved, polygonal, or mixed, that you require.
— Gradient: A simple two-handled control for dividing the screen into two halves, with options for the center, angle, and feathering of the shape. Good for fast sky adjustments.