< Previous | Contents | Next >
Additional Commands in the Tracker Options Menu
There are some additional commands located in the Tracker Options pop-up menu.
— Reset Track Data on Active Window: Lets you delete the tracking data corresponding to the currently selected window.
— Clear Selected Track Data: When you drag a bounding box over parts of one or more curves in the Tracker graph, this command lets you delete that part of the graph. This is useful when you want to eliminate sections of low-quality track data. Portions of curves that are cleared in this way have linear interpolation automatically applied to them, similar to if you used the Keyframes Interpolation controls.
— Delete Keyframe: Deletes tracker graph keyframes at the current position of the playhead.
— Clear All Tracking Points: Clears the tracking points in the Power Window at the frame you are on.
— Show Track: Turn this checkbox on to show the motion path produced by the tracking you’ve done.
— Copy Track Data: Lets you copy track data from the currently selected window. Windows can be selected directly in the Viewer while the Tracker palette is open.
— Paste Track Data: Pastes copied track data to the currently selected window. Windows can be selected directly in the Viewer while the Tracker palette is open.
Cloud Tracker Workflows
The next few examples illustrate how to use the Tracker palette’s controls in practical situations. In many circumstances, objects passing in front of a tracked subject, known as “occlusions,” can cause problems. While the tracker in DaVinci Resolve is highly occlusion-resistant, the following sections show a variety of techniques you can use when an occlusion prevents you from getting a useful track.
Using Interactive Mode to Manually Choose Tracking Features
Interactive mode lets you manually remove or add tracking points to improve tracking performance in situations where the automatic image analysis in DaVinci Resolve provides unsatisfactory results.
![]()
For example, you can delete tracking points within a window that correspond to overlapping features you don’t want to track. Suppose a car that you’re tracking drives by a sign that partially obscures the car. Without intervention, the PowerCurve that’s isolating the car will deform improperly when the car moves along and then away from the sign.
Using Interactive mode, you can delete the tracking points that will overlap the sign you don’t want to track, improving the result.
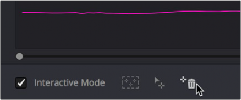
1 Open the Tracker palette.
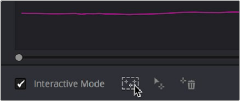
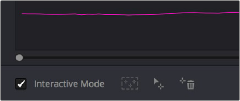
2 Turn on the Interactive Mode checkbox.

Selecting Interactive Mode
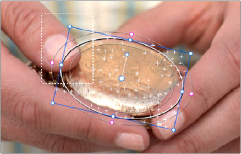
3 In the Viewer, drag a box around the tracking points you want to eliminate within the window.

Dragging a box around tracking points that need to be deleted
4 Click the Delete button.
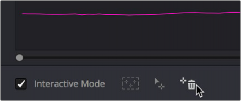
Deleting tracking points
![]()
The points within the selection area are deleted.
Remaining tracking points ready to be used
5 While Interactive mode is still on, click Track Forward or Track Reverse to track the subject using the remaining tracking points.
6 When you’re finished tracking, turn off the Interactive Mode checkbox.
DaVinci Resolve goes back to using automatically placed tracking points.
In another interactive tracking example, you may sometimes run into situations where you want to eliminate all automatically placed tracking points altogether, placing your own in specific regions of the image.
1 Open the Tracker palette.
2 Turn on the Interactive Mode checkbox.
Selecting Interactive mode
3 In the Viewer, drag a box around all the tracking points in the window, and click the Delete button to eliminate all tracking points from the image.
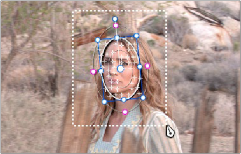
Selection box surrounding all tracking points
4 Click the Delete button to eliminate all tracking points from the image.
Deleting tracking points
![]()
5 Drag a box around the specific area where you’d like to add new tracking points. In this case, you only want to track the top half of the woman’s face, since the bottom half is cut off by the fence posts.
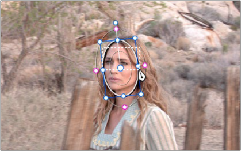
Placing the selection box over the top of the window
6 Now, click the Insert Track Points button.