< Previous | Contents | Next >
1 Move the playhead in the Keyframe Editor’s Timeline ruler to the frame where you want to begin a change.
2 Do one of the following to place a Dynamic keyframe at that frame:
— Choose Mark > Add Keyframe (Command-[).
— Turn on the Auto Keyframe button for the track you want to animate in the Keyframe Editor. Dynamic keyframes are diamond-shaped.
3 If necessary, adjust your clip at this first position of your animated change. If you’re using Auto Keyframe, then you have to make an adjustment for a keyframe to be created.
4 Now, move the playhead to the frame that is at the second position of the animated change you’re making, and create another Dynamic keyframe if you’re creating keyframes manually, or make another adjustment if Auto Keyframe is on.
5 After you’ve created this second keyframe, make whatever adjustments are necessary to the clip to create the final look you need.
At this point, playing from the first keyframe to the second keyframe should show a smoothly animated change from the first adjustment to the second. When you’re finished, make sure you turn Auto Keyframe off if it was enabled.
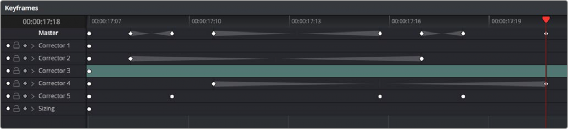
Static Keyframes (Marks)
Static keyframes, or marks, are keyframes that are used to create abrupt, one frame changes from one state to another. They’re typically used to mark edit points separating one shot from another when multiple shots appear within a single clip. However, Static keyframes are also useful in any situation where you need a sudden change from one setting to another, such as when creating a lightning effect.
![]()
Static keyframes are round.
1 Find the frame at which you want the abrupt change to take place, and place a keyframe at that frame by doing one of the following:
— Choose Mark > Make Static Keyframe (Command-]).
— Static keyframes (marks) are round.
2 Move the playhead to any frame before the keyframe to make changes to the entire segment of the clip leading up to the keyframe, or move the playhead to any frame after the keyframe to
make changes to the entire segment of the clip appearing after the keyframe. The playhead does not need to be on top of the keyframe, but if it is, you’ll be adjusting the second portion of the clip.

NOTE: If you’re using Static keyframes to automate grading changes between multiple shots appearing within a single clip, keep in mind that you can’t add nodes from one keyframe to the next as you would if you had split the clip in the Edit page.
NOTE: If you’re using Static keyframes to automate grading changes between multiple shots appearing within a single clip, keep in mind that you can’t add nodes from one keyframe to the next as you would if you had split the clip in the Edit page.
NOTE: If you’re using Static keyframes to automate grading changes between multiple shots appearing within a single clip, keep in mind that you can’t add nodes from one keyframe to the next as you would if you had split the clip in the Edit page.