
< Previous | Contents | Next >
Press CTRL + Talk to show or hide the Talkback Settings window.
NOTE: “Cans” is audio studio jargon for headphones and are part of most any recording studio monitoring setup. Often the producer, engineer, and clients sit in the control room and monitor the session via loudspeakers, while the talent, within the studio, monitors playback and performances via cans.
NOTE: “Cans” is audio studio jargon for headphones and are part of most any recording studio monitoring setup. Often the producer, engineer, and clients sit in the control room and monitor the session via loudspeakers, while the talent, within the studio, monitors playback and performances via cans.
NOTE: “Cans” is audio studio jargon for headphones and are part of most any recording studio monitoring setup. Often the producer, engineer, and clients sit in the control room and monitor the session via loudspeakers, while the talent, within the studio, monitors playback and performances via cans.
![]()
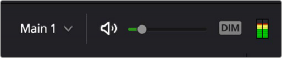
Fairlight page monitoring controls
Search Dial and Transport Controls
Some of the most useful controls on the Desktop Console are the search dial and transport buttons which function exactly as expected for a professional audio control surface. The search dial and surrounding transport buttons offer a complete set of transport commands designed to let you keep your hand in one position while you quickly navigate the Timeline from end to end or anywhere in between in seconds. Additionally, the dial can be used for focused timeline zooming and scrolling.
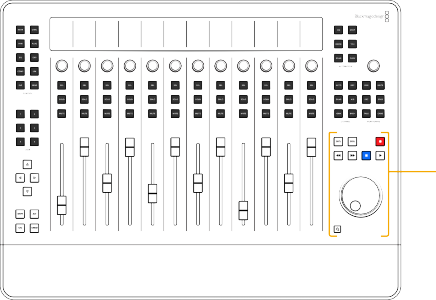
As a means of navigation, scrubbing, playback and zooming, the dial has four modes of operation that are initiated by the respective buttons located above and below the search dial.
![]()
Search dial, Zoom and transport buttons
![]()
In Jog mode, the playhead movement is contingent on the movement of the dial, so you can freely jog forward or in reverse at variable speeds while turning the dial and stops when the dial is released. Jog mode is often used to scrub a specific area to focus on audible cues for mixing, editing, and trimming.
![]()
If the transport is stopped, press Play to engage the dial. Then turn the dial to jog.
If the “Always On” option is checked in System Preferences, the jog dial unconditionally controls the transport immediately whenever you move the dial, even during playback. This “always on” convenience does not affect the transport during recording, Shuttle or Scroll operations.
![]()
Hold CTRL while turning the jog dial to increase playhead movement. Release CTRL to return to standard jog speed.
![]()
![]()
![]()
In Shuttle mode, holding CTRL while turning the jog dial increases the speed 8X.
![]()
![]()
![]()
Hold CTL while scrolling to move the playhead from the project start (first frame) to the project end (last frame) in a single rotation of the dial.
![]()
The Zoom button can also be combined with the User buttons to show and map the onscreen User Mapping menu.
![]()
Hold Zoom and turn the dial to change the horizontal scale of the Timeline on the computer screen.
![]()
![]()
![]()
Hold CTL + Zoom and turn the dial to change the vertical scale of the Timeline, which in turn changes the height of the tracks and the subsequent number of tracks visible in the Timeline.
![]()
![]()
Hold Shift + Zoom and turn the dial to move the current track selection to higher or lower tracks.
![]()
Double-press Zoom to zoom your entire program to fit within the current visible
X2 width of the Timeline. Double-press Zoom again to toggle back to the previous zoom level.
![]()
![]()
![]()
Zoom + any User button toggles on or off the User Mapping menu onscreen. The User Mapping menu is a 2x3 grid that changes in real time by using the ALT and CTL modifier buttons.
![]()
![]()
Hold Zoom + SEL button on Bus or VCA master to spill or unspill member tracks to neighboring faders, either to the left or right depending on the settings in the Setup-Console Quick Menu.

NOTE: Horizontal scaling zooms around the playhead, while vertical zooming focuses on the active selected track.
NOTE: Horizontal scaling zooms around the playhead, while vertical zooming focuses on the active selected track.
NOTE: Horizontal scaling zooms around the playhead, while vertical zooming focuses on the active selected track.
In addition to the jog dial, you’ll find a set of five standard transport control buttons that can be used for recording, playback, and navigation.
![]()
![]()
![]()
![]()
Hold CTL and press the Fast Reverse button to jump the playhead to the project start.
![]()
![]()
![]()
Hold CTL and press the Fast Forward button to jump the playhead to the project end.
![]()
![]()
![]()
![]()
![]() Hold CTL and press Play to locate to the last play point and play again.
Hold CTL and press Play to locate to the last play point and play again.
Control Panels Options in DaVinci Resolve Preferences
The Control Panels preferences offer several options to customize your Desktop Console transport controls, including: