< Previous | Contents | Next >
Controlling the Cintel Film Scanner
The Blackmagic Cintel film scanner is a compact, easy to use, real time film scanner capable of converting 35mm and 16mm (with a separately purchased gate) positive and negative film
![]()
formats into Cintel Raw Image (CRI) digital files that can be organized, edited, and graded using DaVinci Resolve, delivered to any format DaVinci Resolve can output, and archived for later use.
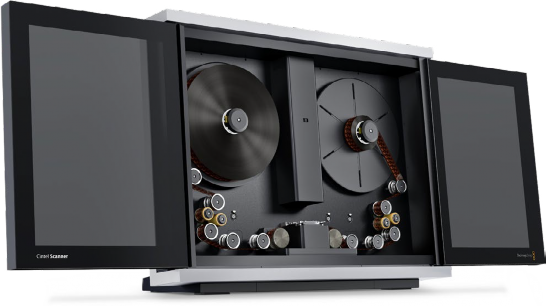
The Cintel scanner

NOTE: This chapter of the DaVinci Resolve manual describes the use of a Cintel film scanner connected to DaVinci Resolve for the purpose of ingesting scanned film. For other operational inquiries, please see the documentation that accompanies the scanner itself, or visit the Blackmagic Design support page on the web to download it.
NOTE: This chapter of the DaVinci Resolve manual describes the use of a Cintel film scanner connected to DaVinci Resolve for the purpose of ingesting scanned film. For other operational inquiries, please see the documentation that accompanies the scanner itself, or visit the Blackmagic Design support page on the web to download it.
NOTE: This chapter of the DaVinci Resolve manual describes the use of a Cintel film scanner connected to DaVinci Resolve for the purpose of ingesting scanned film. For other operational inquiries, please see the documentation that accompanies the scanner itself, or visit the Blackmagic Design support page on the web to download it.
DaVinci Resolve can control any Blackmagic Cintel film scanner that’s connected to your computer via Thunderbolt or PCIe. Once connected, the Film Scanner controls in the Media page can be enabled, which let you choose the film type to be scanned, align the film frames to the sensor, adjust the scanner’s light source for optimal exposure and color, and choose whether to use the scanner’s hardware-based Automatic Perf Detection to perform image stabilization.

TIP: DaVinci Resolve saves all scanner settings in your current project.
TIP: DaVinci Resolve saves all scanner settings in your current project.
TIP: DaVinci Resolve saves all scanner settings in your current project.
This section of the manual shows you how to use settings and features in DaVinci Resolve’s film scanner panel to control your scanner. For example calibrating your scanner, adjusting the light source strength and color temperature, setting image stabilization, and more. You can even set how gentle your Cintel scanner handles film which may have become delicate with age.